12 Irresistible Boston Cream Pie Cookie Bites That Taste Like Pure Nostalgia
The Two-Bite Dessert That Stops Everyone in Their Tracks
Boston Cream Pie Cookie Bites are one of those desserts that make people do a double take — first because they look almost too pretty to eat, and then because the moment you bite into one, all three layers hit you at once: the soft, buttery cookie base, the cool, silky vanilla pastry cream tucked inside, and the glossy chocolate ganache draped over the top like a little edible crown. It is, in every meaningful sense, the full Boston cream pie experience compressed into something you can eat in two bites while standing over the kitchen counter at midnight.
I have been making variations of Boston cream pie for as long as I can remember. It was my grandfather’s favorite dessert — he’d request it for every birthday, every holiday, every occasion that called for something special. For years I made the traditional cake version, and I loved it. But when I started experimenting with cookie cups as a format for miniaturizing classic desserts, Boston cream pie was the first thing I thought of. The architecture is perfect for it: a cookie cup can cradle pastry cream the way a cake layer holds filling, and a spoonful of chocolate ganache sets into a finish that looks genuinely professional with almost no effort at all.
What makes Boston Cream Pie Cookie Bites particularly remarkable is how well they translate the original. This isn’t a simplified, watered-down version of the classic. The pastry cream is real pastry cream — egg yolks, milk, sugar, vanilla — the kind that takes ten minutes on the stovetop and rewards you with a flavor and texture no instant pudding will ever match. The ganache is dark chocolate and heavy cream, glossy and rich and exactly right. The cookie base is soft and vanilla-forward, almost like a sugar cookie crossed with a shortbread, designed to complement rather than compete with the filling.
These are the kind of treats you bring to a dinner party and watch disappear in under five minutes. They’re the kind of thing you make for a bake sale and get asked about for weeks afterward. And they’re entirely achievable for home bakers at any skill level — which is perhaps the most wonderful thing about them.
Why Boston Cream Pie Cookie Bites Work So Well
There’s a reason Boston cream pie has been a beloved American dessert since the 1850s. The combination of vanilla, cream, and chocolate is one of the most universally appealing flavor profiles in existence — sweet but not cloying, rich but balanced, comforting but somehow also elegant. Translating that combination into a cookie bite format actually intensifies what makes it great.
In a slice of traditional Boston cream pie, you get a certain ratio of cake to cream to chocolate in each forkful — and that ratio varies depending on where you cut. In a cookie bite, every single piece has exactly the same composition. Every bite is the ideal bite. That consistency is part of what makes them so satisfying and so impossible to eat just one of.
The cookie cup format also solves a practical problem with the original cake: Boston cream pie doesn’t travel well. The layers slide, the cream can ooze, and a beautiful cake can look fairly tragic after a drive across town. Cookie bites are self-contained, structurally sound, and look just as good at the destination as they did when they left your kitchen. For gifting, parties, potlucks, and bake sales, they are categorically superior to the original in every logistical sense.
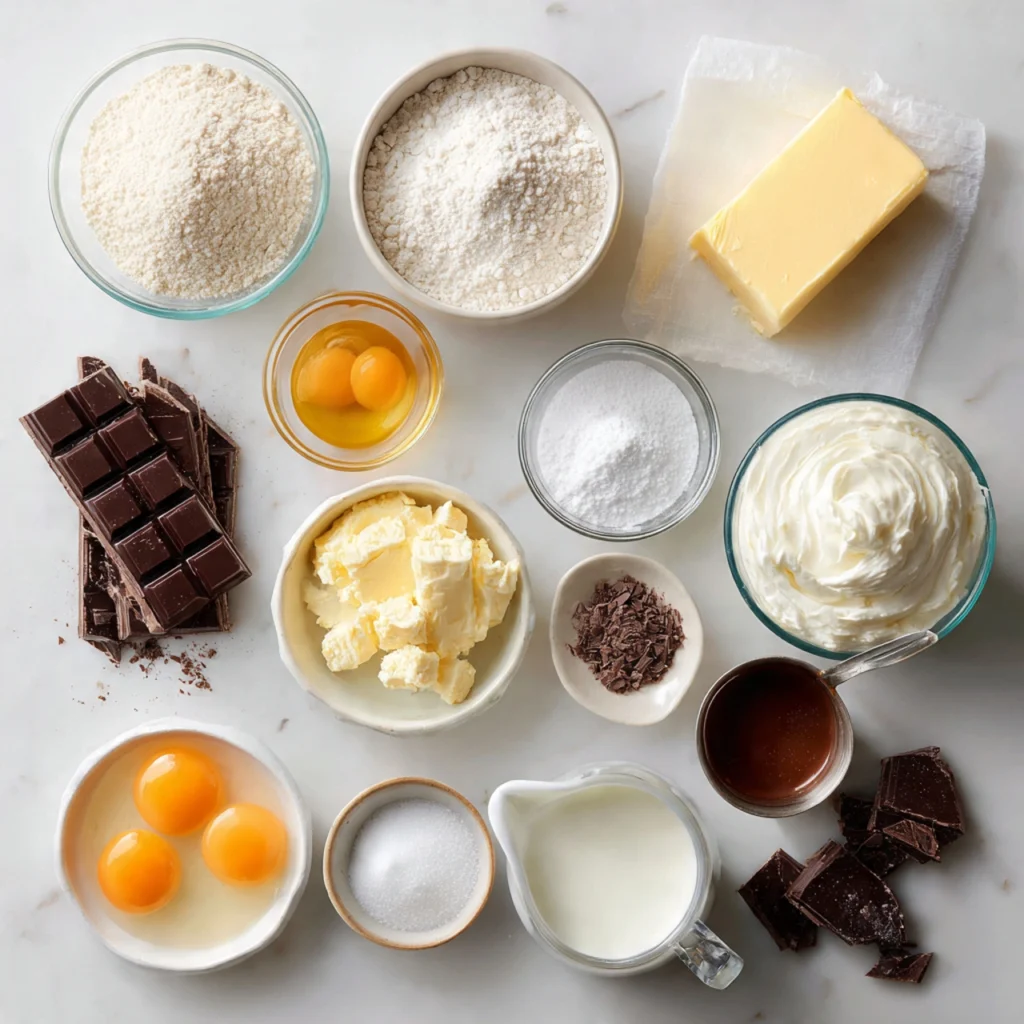
Ingredients
For the Cookie Cups
- 2¼ cups (280g) all-purpose flour
- ½ teaspoon baking powder
- ¼ teaspoon fine sea salt
- ¾ cup (170g) unsalted butter, softened to room temperature
- ¾ cup (150g) granulated sugar
- 1 large egg plus 1 egg yolk, room temperature
- 2 teaspoons pure vanilla extract
- 2 tablespoons full-fat sour cream
For the Vanilla Pastry Cream
- 1½ cups (360ml) whole milk
- 4 large egg yolks
- ⅓ cup (65g) granulated sugar
- 3 tablespoons cornstarch
- 1 tablespoon unsalted butter
- 1½ teaspoons pure vanilla extract or 1 vanilla bean, split and scraped
- Pinch of fine salt
For the Chocolate Ganache
- 4 oz (115g) good-quality dark chocolate, finely chopped (60–70% cacao)
- ½ cup (120ml) heavy cream
- 1 tablespoon unsalted butter, room temperature
- 1 teaspoon light corn syrup (optional, for extra shine)
Optional Garnishes
- A small pinch of flaky sea salt on each ganache top
- Fresh raspberries or sliced strawberries alongside
- A light dusting of cocoa powder
- Chocolate sprinkles for a more festive finish
Equipment You Will Need
- Standard 12-cup muffin tin
- Cooking spray or softened butter for greasing
- Medium heavy-bottomed saucepan
- Fine mesh strainer
- Stand mixer or hand mixer
- Cookie scoop or tablespoon measure
- Small offset spatula or the back of a spoon
- Piping bag or zip-lock bag for filling (optional but helpful)
- Instant-read thermometer (optional)
- Wire cooling rack
Step-by-Step Instructions
Step 1: Make the Pastry Cream First
The pastry cream needs time to chill, so it should always be the first thing you make. In a medium heavy-bottomed saucepan, heat the whole milk over medium heat until it just begins to steam and small bubbles form around the edges. Do not let it boil.
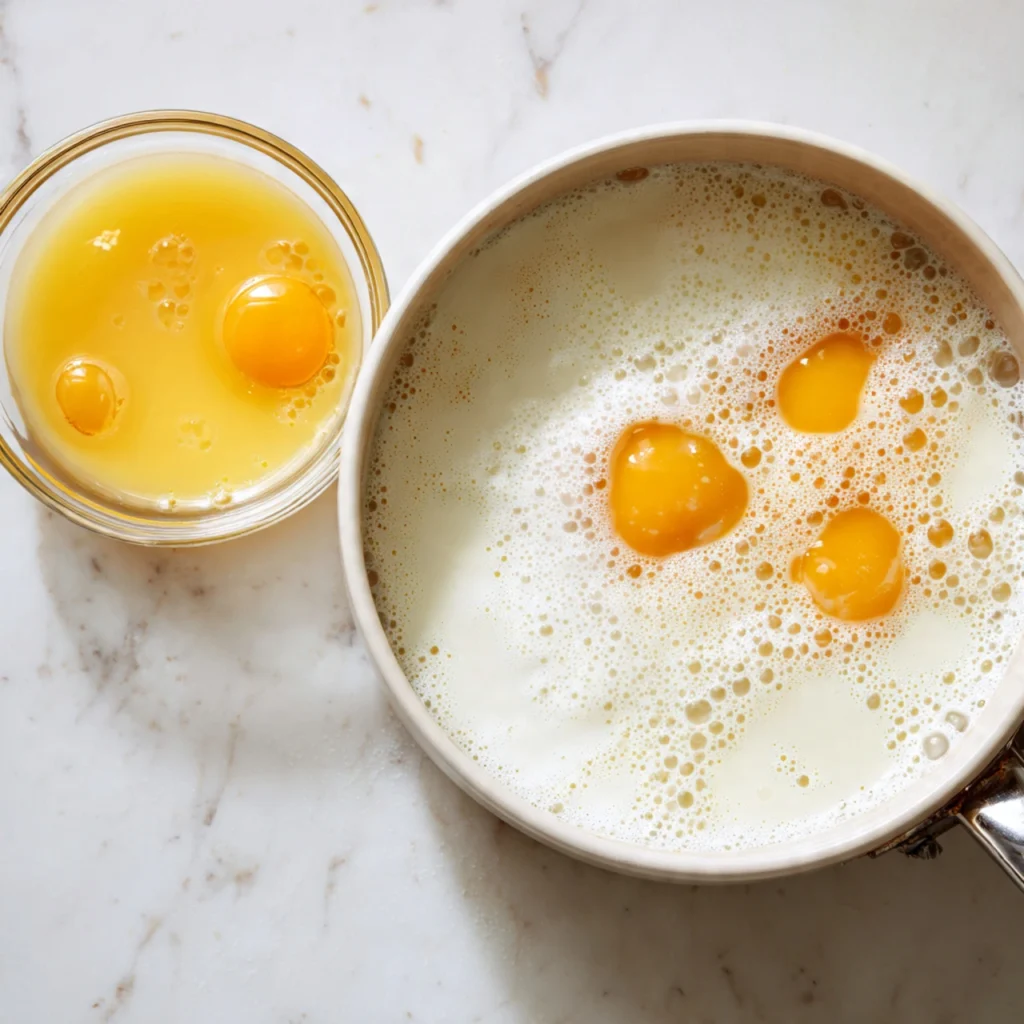
While the milk heats, whisk together the egg yolks, sugar, cornstarch, and salt in a medium bowl until the mixture is pale yellow and smooth. This usually takes about 90 seconds of vigorous whisking.
Once the milk is steaming, slowly pour about half of it into the egg yolk mixture in a thin, steady stream while whisking constantly. This process — called tempering — gradually raises the temperature of the eggs without scrambling them. Once combined, pour the tempered mixture back into the saucepan with the remaining milk.
Cook over medium heat, whisking constantly, until the mixture thickens noticeably and begins to bubble. Keep whisking and cook for one full minute after the first bubble appears — this cooks out the starchy flavor from the cornstarch. Remove from heat and immediately whisk in the butter and vanilla extract.
Pour the finished pastry cream through a fine mesh strainer into a clean bowl to catch any cooked egg bits. Press a sheet of plastic wrap directly onto the surface of the cream — touching it completely — to prevent a skin from forming. Refrigerate for at least 2 hours, or until completely cold and set.
Step 2: Preheat and Prep
Preheat your oven to 350°F (175°C). Generously grease a standard 12-cup muffin tin with cooking spray or softened butter, making sure to coat the sides and bottom of each cup thoroughly. Set aside.
Step 3: Make the Cookie Dough
In a medium bowl, whisk together the flour, baking powder, and salt. Set aside.
In the bowl of a stand mixer fitted with the paddle attachment, beat the softened butter and sugar on medium speed for 2 to 3 minutes until light and fluffy. Add the whole egg, egg yolk, vanilla extract, and sour cream, mixing until fully incorporated and scraping down the sides of the bowl as needed.
Reduce the mixer to low and add the flour mixture in two additions, mixing just until the dough comes together and no dry streaks remain. Do not overmix.
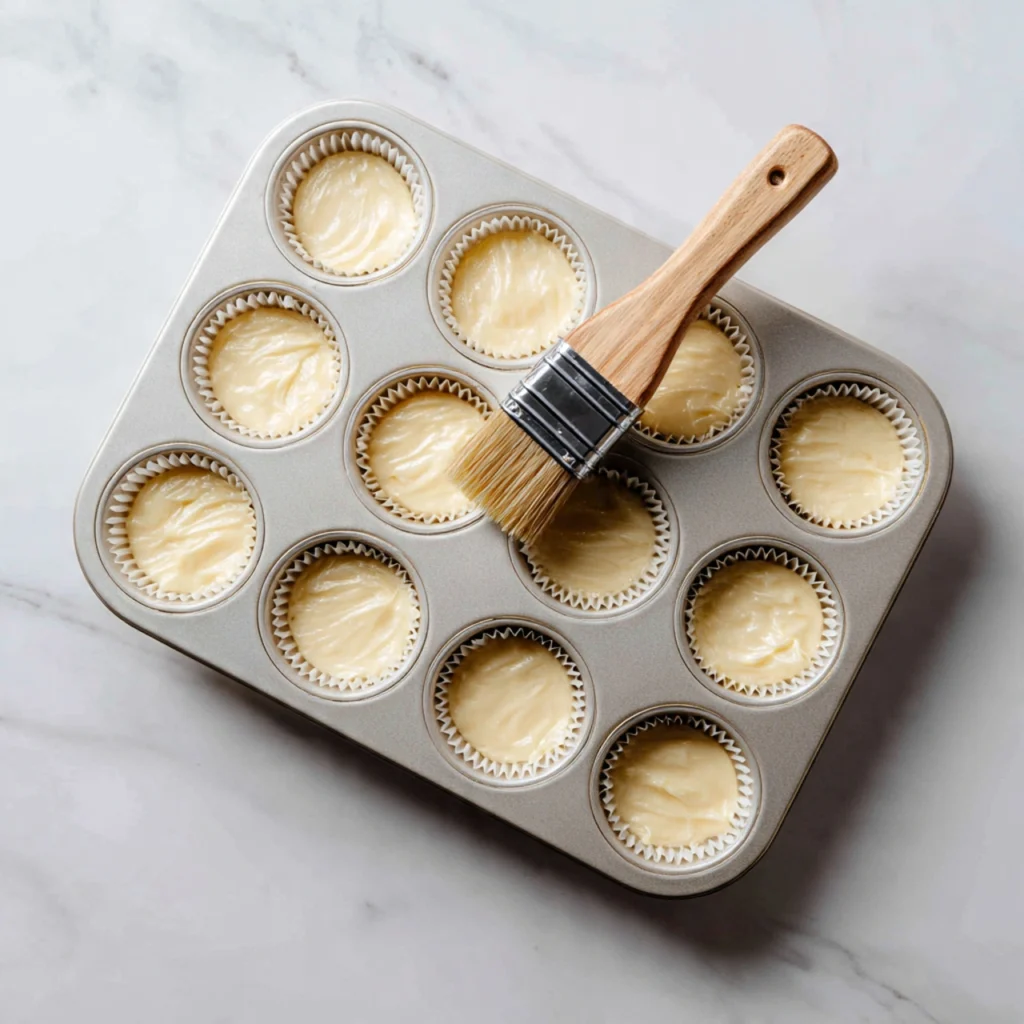
Step 4: Form the Cookie Cups
Using a cookie scoop or a heaping tablespoon, portion the dough into each muffin cup — you want enough dough to fill each cup about two-thirds of the way. Using your fingers or the back of a small spoon, press the dough evenly across the bottom and up the sides of each cup, forming a shallow well in the center. The walls should be about ¼ inch thick and even throughout.
This shaping step takes a little patience but is worth the care — even walls mean even baking, and a deep enough well means plenty of room for pastry cream.
Step 5: Bake the Cookie Cups
Bake for 11 to 13 minutes, until the edges are just barely golden and the centers look set but still slightly soft. The cookies will puff up during baking and may lose some of their cup shape — immediately after removing from the oven, use the back of a teaspoon or a small round measuring spoon to gently press the centers back down while the cookies are still warm and pliable. Work quickly, as they firm up fast.
Let the cookie cups cool in the muffin tin for 10 minutes, then carefully run a small offset spatula or butter knife around the edge of each cup and gently lift them out onto a wire rack. Allow them to cool completely before filling.
Step 6: Fill with Pastry Cream
Once the cookie cups are completely cool and the pastry cream is fully chilled and set, it’s time to assemble. Remove the pastry cream from the refrigerator and whisk it briefly to loosen it up and restore its smooth, creamy consistency.
Transfer the pastry cream to a piping bag fitted with a round tip, or simply use a zip-lock bag with one corner snipped off. Pipe or spoon the pastry cream into each cookie cup, filling it to just below the rim. Smooth the top with the back of a small spoon if needed. Place the filled cookie cups in the refrigerator while you make the ganache.
Step 7: Make the Chocolate Ganache
Place the finely chopped dark chocolate in a heat-proof bowl. In a small saucepan, heat the heavy cream over medium heat until it just begins to simmer — small bubbles around the edges, not a rolling boil. Pour the hot cream directly over the chopped chocolate and let it sit undisturbed for 2 full minutes.
Add the butter and corn syrup if using, then stir gently from the center outward in slow, steady circles until the ganache is completely smooth, glossy, and unified. If any chocolate chunks remain, let it sit for another 30 seconds and stir again. Allow the ganache to cool for 5 to 7 minutes until it’s slightly thickened but still pourable.
Step 8: Top and Set
Remove the filled cookie cups from the refrigerator. Spoon a generous teaspoon of ganache over each pastry cream filling, allowing it to spread naturally to the edges of the cup. If the ganache is the right temperature, it will settle into a smooth, slightly domed finish on its own. If it runs over the edges, it was too warm — let it cool a few more minutes before continuing.
Once all the cookies are topped, return them to the refrigerator for at least 20 minutes to allow the ganache to set completely. Garnish with a tiny pinch of flaky sea salt if desired just before serving.

Pro Tips for Perfect Boston Cream Pie Cookie Bites
Temper the eggs slowly and patiently. The single most intimidating part of making pastry cream for most home bakers is the tempering step — pouring hot milk into raw eggs without scrambling them. The key is to add the hot milk in a thin, slow stream while whisking constantly. If you rush and pour too quickly, the eggs will cook in patches. Take your time and the pastry cream will be silky smooth every single time.
Use good chocolate for the ganache. The ganache is three ingredients, which means there is nowhere for inferior chocolate to hide. Use a good-quality dark chocolate bar — Ghirardelli, Valrhona, Guittard, or even a high-quality store brand. Chocolate chips contain stabilizers that prevent them from melting as smoothly and can result in a grainy, dull ganache. Chop a bar instead.
Press the centers immediately after baking. This is the step that makes or breaks the shape of your cookie cups. The moment the pan comes out of the oven, press those centers down before the cookies cool and set. A small round measuring spoon — the ½ teaspoon or 1 teaspoon size — is the perfect tool for this. If you wait even a few minutes, the cookies will be too firm to reshape.
Make the pastry cream the day before. Boston Cream Pie Cookie Bites are actually an excellent make-ahead dessert. The pastry cream improves in flavor after a night in the refrigerator as the vanilla has time to fully infuse. Making it a day ahead also removes one major task from the day of assembly and makes the whole process feel much more relaxed.
Strain the pastry cream every time. Even if you think you tempered perfectly and whisked without stopping, always strain the finished pastry cream. It takes ten seconds and guarantees a completely smooth, lump-free filling. Skipping this step is a small gamble that occasionally results in an unpleasant texture — not worth the risk.
Let the ganache cool to the right temperature before pouring. Ganache that is too hot will melt the pastry cream beneath it and run over the sides of the cookie cups. Ganache that is too cool will set immediately upon contact and won’t spread smoothly. The ideal temperature is when it coats the back of a spoon and falls in a thick, slow ribbon — roughly 90°F if you want to use a thermometer.
Common Mistakes to Avoid
Skipping the plastic wrap on the pastry cream surface. If you don’t press plastic wrap directly onto the surface of the pastry cream while it chills, a thick, rubbery skin will form on top. That skin doesn’t re-incorporate when you whisk the cream later — it stays as unpleasant lumps in your otherwise perfect filling. Always cover the surface directly, not just the bowl.
Underbaking the cookie cups. It can be tempting to pull the cookie cups early because they still look pale and soft. Underbaked cups won’t hold their shape when you press the centers and won’t be sturdy enough to support the filling without becoming soggy. Wait for the edges to show the faintest golden color before pulling them from the oven.
Filling warm cookie cups. Warm cookies will melt the pastry cream and cause the ganache to slip. This is non-negotiable — the cookie cups must be completely at room temperature before any filling goes in. If you’re short on time, 15 minutes in the refrigerator after they come off the cooling rack will speed things along.
Using milk chocolate instead of dark. Milk chocolate ganache is significantly sweeter and much less stable at room temperature than dark chocolate ganache. Given that the pastry cream filling is already fairly sweet, a dark chocolate ganache provides the balance the recipe needs. Milk chocolate can work in a pinch, but reduce the cream by a tablespoon to compensate for the higher sugar and fat content.
Rushing the ganache pour. Patience is the entire job description when it comes to ganache. Pour it too fast and you’ll have a mess. Pour it when it’s too warm and the filling suffers. Pour it when it’s too cold and it won’t smooth out. Give the ganache the time it needs to reach the right temperature and your cookie bites will look like they came from a professional patisserie.
Overfilling the pastry cream. It’s tempting to pile the pastry cream as high as possible — more filling sounds better, right? But overfilled cups make the ganache topping slide sideways and make the bites difficult to eat cleanly. Fill to just below the rim of the cookie cup and let the ganache create a finished, level top.
Storage and Serving Suggestions
Storing Boston Cream Pie Cookie Bites
Because of the pastry cream filling, these cookie bites must be stored in the refrigerator. Place them in a single layer in an airtight container and refrigerate for up to 4 days. The cookie cups will soften slightly over time as they absorb moisture from the pastry cream — they’re still delicious, but the texture is best on days one and two.
If you need to stack them for storage, place a sheet of parchment between layers to protect the ganache tops from being smudged or damaged.
Making Ahead
Boston Cream Pie Cookie Bites are genuinely excellent for making ahead in components. The pastry cream keeps in the refrigerator for up to 3 days. The baked, unfilled cookie cups can be stored at room temperature in an airtight container for up to 2 days. Assemble — fill with cream and top with ganache — no more than 24 hours before serving for the best texture and appearance.
Freezing
The baked, unfilled cookie cups freeze well for up to 6 weeks. Thaw at room temperature for about 30 minutes before filling. The pastry cream does not freeze well — it separates and becomes watery upon thawing. Make fresh pastry cream for each assembly.
Serving Suggestions
Serve Boston Cream Pie Cookie Bites cold or at cool room temperature — the pastry cream is best when it’s still slightly chilled and holds its shape cleanly. Arrange them on a tiered dessert stand for a party presentation that looks far more elaborate than the effort involved. They pair beautifully with black coffee, espresso, or a glass of cold milk. For a more formal dessert plate, arrange three cookie bites with a small scoop of vanilla ice cream and a drizzle of extra ganache alongside.
FAQ
Can I use store-bought vanilla pudding instead of making pastry cream from scratch?
You can, and it will produce a perfectly acceptable result if you’re short on time. Use instant vanilla pudding made with whole milk rather than the package directions’ standard ratio — slightly less milk gives a firmer, more pipeable consistency. That said, homemade pastry cream has a depth of flavor, a silkiness, and a vanilla richness that instant pudding simply cannot replicate. If you’ve never made pastry cream before, this recipe is a genuinely approachable introduction to it.
My pastry cream came out lumpy. What went wrong?
Lumpy pastry cream almost always means the eggs were added to the hot milk too quickly during tempering, causing them to scramble partially. To rescue lumpy pastry cream, strain it through a fine mesh strainer while it’s still warm — this removes the cooked egg bits and leaves you with a smoother cream. If it’s very lumpy, blend it briefly with an immersion blender before straining. Prevention is better than rescue: always add the hot milk slowly and whisk constantly.
Can I make these in a mini muffin tin instead of a standard one?
Absolutely, and mini versions are genuinely adorable for parties and entertaining. Use about a teaspoon of dough per cup, press to form small wells, and reduce the baking time to 8 to 10 minutes. The filling quantities in this recipe will make approximately 24 mini cookie bites instead of 12 standard ones. The technique is identical — just scaled down.
How do I get the ganache perfectly smooth and shiny?
Three things produce a glossy, professional ganache: finely chopped chocolate rather than chips, cream that is hot but not boiling, and a tablespoon of butter stirred in at the end. The butter adds fat that creates shine and a smooth, almost lacquered finish. The optional corn syrup also contributes to that mirror-like gloss. Stir slowly from the center outward rather than vigorously — aggressive stirring incorporates air bubbles that dull the surface.
Can I make these gluten-free?
Yes, with substitutions. Replace the all-purpose flour in the cookie cups with a 1:1 gluten-free baking blend — Bob’s Red Mill and King Arthur both perform well in this application. The pastry cream and ganache are naturally gluten-free as written. Check your cornstarch brand to confirm it’s certified gluten-free if cross-contamination is a concern. The texture of the gluten-free cookie cups may be slightly more delicate, so handle them carefully when removing from the muffin tin.
Why did my cookie cups lose their shape during baking?
This happens for two reasons: the dough walls were pressed too thin before baking, or the dough was too warm when it went into the oven. Make sure the walls of each cup are an even quarter inch thick before baking. If your kitchen is warm or your butter was very soft, refrigerate the shaped dough in the muffin tin for 15 minutes before baking — the cold butter will hold the shape better in the initial heat of the oven. And remember to press the centers immediately after baking while the cookies are still warm and malleable.
Approximate Nutrition Information
Per cookie bite, based on a yield of 12 standard cookie bites. Values are approximate and will vary based on specific brands and ingredient quantities used.
| Nutrient | Per Cookie Bite |
|---|---|
| Calories | 320 kcal |
| Total Fat | 18g |
| Saturated Fat | 11g |
| Cholesterol | 105mg |
| Sodium | 95mg |
| Total Carbohydrates | 36g |
| Dietary Fiber | 1g |
| Total Sugars | 21g |
| Protein | 5g |
| Calcium | 65mg |
| Iron | 1.5mg |
These values are calculated using standard nutrition databases and are intended as a general guide. For precise dietary tracking, calculate using your exact ingredient brands and measured quantities.
Some Desserts Just Deserve to Be Reimagined
Boston Cream Pie Cookie Bites are what happens when you take a beloved classic and ask a simple question: how can I make this even better? Not different for the sake of different — better. More convenient, more consistent, more shareable, and just as faithful to the original flavor that made people love Boston cream pie in the first place.
What strikes me every time I make these is how the cookie cup format actually elevates the experience rather than diminishing it. There’s something about getting the perfect ratio of cookie to cream to chocolate in every single bite that the original cake, as wonderful as it is, can’t always guarantee. Here, there are no disappointing forkfuls. There are no slices where the cream has slid to one side or the ganache layer cracked unevenly. Every single Boston Cream Pie Cookie Bite is exactly what it promises to be.
The technique behind these bites — real pastry cream, real ganache, a properly made cookie dough — is also genuinely worth learning if you haven’t before. Each of those three components is a building block that opens doors to dozens of other recipes. Once you know how to make pastry cream, you can fill éclairs, top tarts, layer mille-feuille. Once you understand ganache, you can glaze cakes, fill truffles, make fudge sauce. The skills this recipe teaches are skills that will serve you for years.
So whether you’re making Boston Cream Pie Cookie Bites for a special occasion, a casual get-together, or simply because you wanted to do something ambitious and rewarding on a weekend afternoon, know that the effort is absolutely worth it. Know that the first time someone bites into one of these at your table and their eyes go wide — that moment of genuine, uncomplicated pleasure — is exactly what baking is for.
Make them once and they’ll be on your permanent rotation. I can promise you that much.
Boston Cream Pie Cookie Bites
Ingredients
Equipment
Method
- In a medium heavy-bottomed saucepan, heat the whole milk over medium heat until just steaming with small bubbles forming around the edges. Meanwhile, whisk together the egg yolks, sugar, cornstarch, and salt in a medium bowl until pale yellow and smooth. Slowly pour half the hot milk into the egg mixture in a thin stream while whisking constantly to temper the eggs. Pour the tempered mixture back into the saucepan with the remaining milk.
- Cook the mixture over medium heat, whisking constantly, until it thickens and begins to bubble. Continue whisking and cook for one full minute after the first bubble appears. Remove from heat and whisk in the butter and vanilla extract. Strain through a fine mesh strainer into a clean bowl. Press plastic wrap directly onto the surface of the cream and refrigerate for at least 2 hours until completely cold and set.
- Preheat your oven to 350°F (175°C). Generously grease a standard 12-cup muffin tin with cooking spray or softened butter, coating the sides and bottom of each cup thoroughly.
- In a medium bowl, whisk together the flour, baking powder, and salt. In a stand mixer fitted with the paddle attachment, beat the softened butter and sugar on medium speed for 2 to 3 minutes until light and fluffy. Add the egg, egg yolk, vanilla extract, and sour cream, mixing until fully incorporated and scraping down the bowl as needed. Reduce to low and add the flour mixture in two additions, mixing just until the dough comes together. Do not overmix.
- Using a cookie scoop or heaping tablespoon, portion the dough into each muffin cup, filling about two-thirds of the way. Using your fingers or the back of a small spoon, press the dough evenly across the bottom and up the sides of each cup to form a shallow well. Keep the walls an even quarter-inch thick throughout.
- Bake for 11 to 13 minutes until edges are just barely golden and centers look set but slightly soft. Immediately after removing from the oven, use the back of a small teaspoon to gently press the centers back down while still warm and pliable. Let cool in the tin for 10 minutes, then carefully remove to a wire rack and cool completely before filling.
- Remove the chilled pastry cream from the refrigerator and whisk briefly to restore its smooth, creamy consistency. Transfer to a piping bag fitted with a round tip or a zip-lock bag with one corner snipped. Pipe or spoon the pastry cream into each completely cooled cookie cup, filling to just below the rim. Smooth the top with the back of a small spoon. Refrigerate filled cups while making the ganache.
- Place the finely chopped dark chocolate in a heat-proof bowl. Heat the heavy cream in a small saucepan over medium heat until just simmering. Pour the hot cream over the chocolate and let sit undisturbed for 2 full minutes. Add the butter and corn syrup if using, then stir gently from the center outward until completely smooth and glossy. Allow the ganache to cool for 5 to 7 minutes until slightly thickened but still pourable.
- Remove the filled cookie cups from the refrigerator. Spoon a generous teaspoon of ganache over each pastry cream filling, allowing it to spread naturally to the edges. Refrigerate for at least 20 minutes to allow the ganache to set completely. Garnish with a tiny pinch of flaky sea salt if desired just before serving.


