Homemade Apple Pie: The Ultimate Classic Recipe That Never Fails

Introduction: Why Homemade Apple Pie Is the Ultimate Comfort Bake
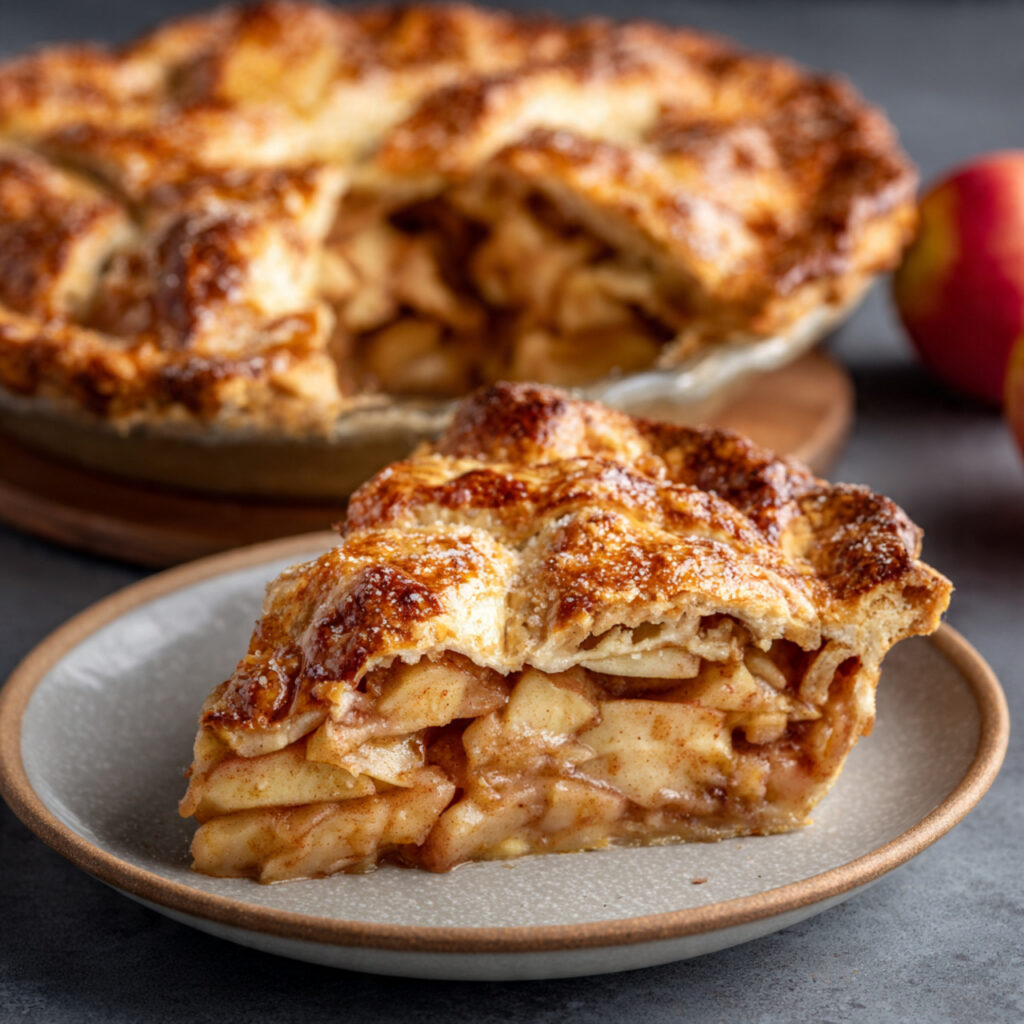
Homemade apple pie is, without a single doubt, one of the most iconic, soul-satisfying things you can pull out of an oven. That moment when the kitchen fills with the warm scent of cinnamon-laced apples bubbling beneath a golden, butter-kissed crust — it’s not just baking. It’s memory-making.
I’ve been baking apple pies for over two decades, and I’ll tell you something that most recipes won’t: the difference between a forgettable apple pie and an absolutely transcendent one comes down to a handful of small decisions. The apple variety you choose. How cold your butter is. Whether you blind-bake or not. These details matter more than you’d think.
This guide isn’t just a recipe — it’s a full roadmap. Whether you’re a first-time pie baker nervously crimping your first crust, or a seasoned home cook who wants to finally nail that perfectly set, non-soggy filling, this article covers every angle. We’re talking ingredients, step-by-step instructions, pro baking tips, common pitfalls, storage advice, FAQs, and a full nutrition breakdown.
Let’s get into it.
What Makes a Truly Great Homemade Apple Pie?
Before we talk ingredients, it’s worth understanding what we’re actually chasing here. A great homemade apple pie has three distinct elements working in harmony:
1. A flaky, tender crust that shatters slightly when you cut it, with visible layers and a rich buttery flavor. Not crumbly. Not tough. Flaky.
2. A filling that holds its shape — apples that are soft but not mushy, swimming in a glossy, spiced syrup that’s thick enough to slice cleanly but not gluey or starchy.
3. Balance of flavor — the sweetness of the apples offset by tartness, warming spices that complement rather than overpower, and just enough salt to make every bite pop.
Sounds simple. And it is — once you know the rules.
Ingredients
For the Pie Crust (Double Crust)
- 2½ cups all-purpose flour, plus extra for dusting
- 1 tablespoon granulated sugar
- 1 teaspoon fine sea salt
- 1 cup (2 sticks / 225g) unsalted butter, very cold, cut into ½-inch cubes
- 6–8 tablespoons ice water (add one tablespoon at a time)
For the Apple Filling
- 3 lbs (about 6–7 medium) apples — use a mix of Granny Smith and Honeycrisp
- ¾ cup granulated sugar (adjust based on apple sweetness)
- 2 tablespoons light brown sugar, packed
- 2 tablespoons cornstarch (or 3 tablespoons all-purpose flour)
- 1½ teaspoons ground cinnamon
- ¼ teaspoon ground nutmeg
- ⅛ teaspoon ground allspice (optional but recommended)
- 1 tablespoon fresh lemon juice
- 1 teaspoon pure vanilla extract
- 1 tablespoon unsalted butter, cut into small pieces (dotted on filling)
- Pinch of fine salt
For the Egg Wash & Finishing
- 1 large egg
- 1 tablespoon whole milk or heavy cream
- 1–2 tablespoons coarse or turbinado sugar (for topping)

Step-by-Step Instructions
Step 1: Make the Pie Crust Dough
Start with the crust because it needs to rest in the refrigerator for at least one hour — this is non-negotiable for a flaky result.
In a large bowl, whisk together the flour, sugar, and salt. Add the cold butter cubes. Using your fingertips or a pastry cutter, work the butter into the flour mixture until you have a combination of pea-sized chunks and flat, flaky shards. You want visible butter pieces — this is what creates layers. Don’t overwork it.
Drizzle in ice water, one tablespoon at a time, tossing with a fork after each addition. Stop adding water when the dough just comes together when you squeeze a handful. It should look shaggy and slightly uneven — not smooth.
Turn the dough out onto a lightly floured surface, divide it in half, and press each half into a flat disk. Wrap tightly in plastic wrap and refrigerate for at least 1 hour, or up to 2 days.

Step 2: Prepare the Apple Filling
Peel, core, and slice your apples into ¼-inch thick slices. Uniform thickness matters here — it ensures even cooking so you don’t end up with some apples turning to mush while others stay crunchy.
In a large bowl, toss the apple slices with lemon juice first — this prevents browning and adds brightness. Then add the granulated sugar, brown sugar, cornstarch, cinnamon, nutmeg, allspice, vanilla, and salt. Toss everything together until every apple slice is evenly coated.
Here’s a trick most recipes skip: let the apples macerate for 20–30 minutes in the bowl. They’ll release some of their juices. Drain off about half of that liquid before adding the filling to your crust. This single step dramatically reduces the chances of a soupy pie.
Step 3: Roll Out the Bottom Crust
Preheat your oven to 425°F (220°C) with a rack positioned in the lower third of the oven. Place a baking sheet on the rack as it heats — you’ll bake the pie directly on this hot surface, which helps cook the bottom crust through.
Remove one dough disk from the refrigerator. On a lightly floured surface (or between two sheets of parchment paper), roll the dough from the center outward in all directions, rotating a quarter turn after every few strokes. Roll it into a roughly 12-inch circle about ⅛-inch thick.
Carefully transfer the dough to a 9-inch pie dish. Press it gently into the bottom and up the sides without stretching it — stretched dough shrinks when baked. Let the excess hang over the edge. Refrigerate while you roll the top crust.

Step 4: Fill the Pie
Pour your drained apple filling into the crust-lined pie dish, mounding it slightly in the center (the apples will shrink as they cook). Dot the top of the filling with the small butter pieces.
Step 5: Add the Top Crust
Roll out your second dough disk the same way. For a classic look, lay it directly over the filling, press the edges together, and trim to a 1-inch overhang. Fold the overhang under itself and crimp decoratively using your fingers or a fork.

Alternatively, cut the dough into ½-inch strips and create a lattice top — this allows steam to escape naturally and gives you a beautiful, bakery-style finish.
Cut 4–5 small steam vents into a solid top crust (a sharp knife or small cookie cutter works well). For a lattice top, the gaps handle ventilation for you.
Step 6: Egg Wash and Bake
Whisk together the egg and milk for your egg wash. Brush it evenly over the top crust — get into all the crevices and edges. Sprinkle generously with coarse sugar.
Place the pie on the preheated baking sheet in the oven.
Bake at 425°F for 20 minutes, then reduce the oven temperature to 375°F (190°C) and bake for another 35–45 minutes, until the crust is deeply golden brown and the filling is visibly bubbling through the vents.
If the edges are browning too fast, shield them with a pie crust shield or loosely tent with aluminum foil.
Step 7: Cool — This Step Is Not Optional
Remove the pie from the oven and place it on a wire rack. Let it cool for a minimum of 3–4 hours before slicing. Cutting into a hot pie will give you a runny, messy filling. The cooling time allows the cornstarch-thickened juices to set into that perfectly glossy, cohesive filling.

Pro Tips for the Perfect Homemade Apple Pie
Use a Blend of Apple Varieties
Single-variety pies are fine, but blending apples is a game-changer. Granny Smith apples hold their structure and bring tartness. Honeycrisp adds sweetness and a slight floral note. Golden Delicious softens beautifully and contributes natural juice. Aim for at least two varieties — two-thirds firm/tart, one-third sweet.
Keep Everything Cold
Butter temperature is the single biggest factor in crust flakiness. Cold butter creates steam pockets as it bakes, and those steam pockets are your layers. If your butter softens during mixing, pop the bowl in the freezer for 10 minutes before continuing. Some bakers even chill their flour.
Don’t Skip the Pre-Drain
As mentioned in the instructions, letting apples macerate and draining excess juice is the most underused trick in pie baking. Too much liquid = soggy bottom crust and runny filling.
Bake on a Hot Surface
Sliding your pie onto a preheated baking sheet gives the bottom crust immediate heat contact, helping it bake through and crisp up instead of steaming and softening.
Let the Filling Bubble Visibly
Don’t pull the pie out just because the crust looks done. You need to see filling bubbling through the vents — that’s how you know the cornstarch has activated and your filling will set properly.
Taste Your Apples First
Apple sweetness varies wildly by season and variety. Always taste a slice before adding sugar. If your apples are very sweet, reduce the sugar by 2 tablespoons. If they’re extra tart, add a touch more.
Vodka in the Crust (Seriously)
Replace 2 tablespoons of the ice water with cold vodka. Unlike water, alcohol doesn’t develop gluten, which means an even more tender, flakier crust. The alcohol evaporates completely during baking — you won’t taste it.
Common Mistakes to Avoid
Warm butter in the crust. This is the #1 crust killer. If your butter is warm, you’ll get a mealy, dense crust instead of a flaky one. Work quickly and keep everything cold.
Overworking the dough. The more you mix, the more gluten you develop, and the tougher your crust becomes. Mix only until the dough just comes together.
Not pre-cooking or draining apples. Raw apples release a lot of liquid as they bake. If you skip the macerate-and-drain step, your pie filling will be watery and your bottom crust will be soggy.
Cutting the pie while it’s hot. I know it’s tempting. But a freshly-baked pie needs those cooling hours for the filling to set. Cut too soon and you’ll have a delicious but structurally disastrous apple soup situation.
Too much flour on your rolling surface. Excess flour gets worked into the dough and toughens it. Use just enough to prevent sticking.
Forgetting to vent the top crust. Steam needs somewhere to go. Without vents, pressure builds up and can cause the filling to push through the crimped edges, creating a mess and an uneven bake.
Using the wrong apples. Avoid Red Delicious and McIntosh for pie — they turn to applesauce in the oven. Stick to firm varieties like Granny Smith, Honeycrisp, Braeburn, or Pink Lady.
Storage and Serving Suggestions
How to Store Homemade Apple Pie
At room temperature: Loosely cover with foil or plastic wrap and store at room temperature for up to 2 days. Many bakers actually prefer pie at room temp — the flavors deepen and the crust stays crisper than it does refrigerated.
In the refrigerator: Store covered for up to 5 days. The crust will soften slightly, but a quick 10-minute reheat in a 350°F oven will revive it beautifully.
In the freezer: Apple pie freezes exceptionally well. You can freeze a whole baked pie, individual slices, or even an unbaked assembled pie. Wrap tightly in plastic wrap, then foil. Baked pie keeps frozen for up to 4 months; unbaked for up to 3 months. Bake frozen unbaked pie directly from frozen, adding 15–20 extra minutes.
Serving Suggestions
The classics exist for a reason. A warm slice of homemade apple pie topped with a generous scoop of vanilla bean ice cream is an experience that transcends seasons. But there are other wonderful ways to serve it:
- With freshly whipped cream lightly sweetened with a touch of vanilla
- With a sharp cheddar cheese slice — this is an old New England tradition that sounds bizarre and tastes extraordinary
- Drizzled with salted caramel sauce for a next-level dessert moment
- With a dollop of crème fraîche for a slightly tangy, sophisticated finish
Warm the pie slightly before serving — 10–15 minutes at 300°F brings it back to that just-baked glory.
Frequently Asked Questions
Q1: What are the best apples to use in a homemade apple pie? The best pies use a blend. For structure and tartness, Granny Smith is the gold standard. For sweetness and flavor complexity, pair them with Honeycrisp, Braeburn, or Pink Lady. Avoid Red Delicious and McIntosh — they break down completely during baking and give you a mushy filling.
Q2: Why is my apple pie filling so watery? This almost always comes down to one of two things: not draining the macerated apple juices before filling the pie, or pulling the pie from the oven before the filling has actively bubbled. Both are easy fixes. Drain your apples, bake until you see a full, rolling bubble through the vents, and then let the pie cool completely before slicing.
Q3: Can I make homemade apple pie ahead of time? Absolutely. The crust dough can be made up to 2 days in advance and refrigerated, or frozen for up to 3 months. The entire assembled unbaked pie can be frozen and baked from frozen. A fully baked pie can be made a day ahead — it often tastes even better the next day as the flavors meld.
Q4: How do I keep the bottom crust from getting soggy? Three strategies work together: first, drain excess juice from the macerating apples; second, bake the pie on a preheated baking sheet on the lower oven rack; third, some bakers brush the bottom crust with a thin layer of egg white before adding the filling, which creates a moisture barrier.
Q5: Can I use store-bought pie crust instead of homemade? Yes, you can, and there’s no shame in it. A quality refrigerated pie crust (like Pillsbury) will give you a decent result. That said, homemade crust has a flavor and flakiness that’s genuinely difficult to replicate from a box, and once you’ve made it a few times, the process becomes surprisingly quick.
Q6: How do I get a shiny, golden crust? The egg wash is your best friend here. The egg protein browns beautifully in the oven’s heat, giving you that deep amber shine you see in bakery windows. For maximum color, use a whole egg beaten with cream rather than just egg white or milk. The coarse sugar sprinkled on top adds sparkle and crunch.
Q7: My crust keeps shrinking in the pan. What am I doing wrong? Shrinkage is caused by stretching the dough when you press it into the pan, or by not resting the dough long enough before baking. After rolling, lay the dough gently into the pan — let gravity do the work — and don’t pull or press it. Then refrigerate the crust-lined pan for 15–20 minutes before filling and baking.
Nutrition Information (Approximate Per Slice)
Based on 8 slices per 9-inch pie, using the full recipe above.
| Nutrient | Amount Per Slice |
|---|---|
| Calories | ~420 kcal |
| Total Fat | 20g |
| Saturated Fat | 12g |
| Cholesterol | 65mg |
| Sodium | 280mg |
| Total Carbohydrates | 58g |
| Dietary Fiber | 3g |
| Total Sugars | 30g |
| Added Sugars | 18g |
| Protein | 4g |
| Vitamin C | 6% DV |
| Iron | 8% DV |
| Calcium | 2% DV |
Note: These are approximate values and will vary depending on the specific brands and exact amounts of ingredients used. Values calculated without ice cream or additional toppings.
Conclusion
There’s a reason homemade apple pie has been at the center of celebrations, Sunday dinners, and holiday tables for generations. It’s more than dessert — it’s a tradition you make with your own hands, shaped by your choices, and shared with the people you love.
This recipe gives you everything you need: a buttery, shatteringly flaky crust, a perfectly spiced filling that sets cleanly and slices beautifully, and the confidence of knowing exactly what to do and why. Follow the tips, avoid the common mistakes, and resist the urge to cut that first slice while it’s still steaming.
And remember — your first homemade apple pie might not be perfect, and that’s completely okay. It will still taste like something you made, and that always counts for a great deal. By your third or fourth pie, you’ll have your own rhythm, your own preferred apple combination, maybe your own little twist on the spice blend.
That’s when a recipe stops being a recipe and starts being yours.
Now go preheat that oven.

Homemade Apple Pie
Ingredients
Equipment
Method
- In a large bowl, whisk together the flour, sugar, and salt. Add the cold butter cubes and work them into the flour using your fingertips or a pastry cutter until you have a mix of pea-sized chunks and flat, flaky shards — visible butter pieces are essential for layers. Do not overwork. Drizzle in ice water one tablespoon at a time, tossing with a fork after each addition, until the dough just comes together when squeezed. It should look shaggy and uneven, not smooth.
- Turn the dough out onto a lightly floured surface and divide it in half. Press each half into a flat disk. Wrap each disk tightly in plastic wrap and refrigerate for at least 1 hour, or up to 2 days. This rest is essential — it relaxes the gluten and firms the butter back up for a flaky crust.
- Peel, core, and slice the apples into uniform ¼-inch thick slices. In a large bowl, toss the apple slices with lemon juice first. Then add the granulated sugar, brown sugar, cornstarch, cinnamon, nutmeg, allspice, vanilla, and salt. Toss until every slice is evenly coated. Let the mixture sit and macerate for 20–30 minutes, then drain off approximately half of the released liquid before using the filling.
- Preheat your oven to 425°F (220°C) with a rack in the lower third. Place an empty baking sheet on the rack to preheat. Remove one dough disk from the fridge and roll it on a lightly floured surface into a 12-inch circle about ⅛-inch thick. Carefully transfer to a 9-inch pie dish, pressing it gently into the bottom and up the sides without stretching. Let the excess hang over the edge. Refrigerate while you roll the top crust.
- Pour the drained apple filling into the crust-lined pie dish, mounding it slightly in the center. Dot the top of the filling evenly with the small pieces of butter.
- Roll out the second dough disk into a 12-inch circle. Lay it over the filling and press the edges together. Trim to a 1-inch overhang, fold it under itself, and crimp decoratively with your fingers or a fork. Alternatively, cut the dough into ½-inch strips and weave a lattice top. Cut 4–5 steam vents into a solid top crust using a sharp knife.
- Whisk the egg and milk together. Brush the egg wash evenly over the entire top crust, including all edges and crevices. Sprinkle generously with coarse sugar.
- Place the pie on the preheated baking sheet in the oven. Bake at 425°F (220°C) for 20 minutes, then reduce the temperature to 375°F (190°C) and continue baking for 35–45 minutes, until the crust is deeply golden brown and the filling is visibly bubbling through the vents. Shield the edges with foil or a pie crust shield if they begin to brown too quickly.
- Transfer the pie to a wire rack and allow it to cool for a minimum of 3–4 hours before slicing. This cooling period is not optional — it allows the cornstarch-thickened filling to fully set so your slices hold their shape cleanly. Serve with vanilla ice cream, freshly whipped cream, or a slice of sharp cheddar cheese.


