Easter Egg Hunt Blondies: The Most Gloriously Festive Holiday Bake That Disappears Before the Hunt Even Starts

Introduction: Why Easter Egg Hunt Blondies Are the Most Wonderfully Joyful Thing You Can Bake This Spring
Easter Egg Hunt Blondies are the kind of bake that makes a holiday table feel genuinely festive without requiring any professional skill, specialist equipment, or more than about forty-five minutes of your time from start to finish. They are chewy, fudgy, golden brown and deeply butterscotch-flavoured with a scattering of colourful candy-coated chocolate Easter eggs pressed into the top that makes them look like a nest of found treasure — which is, of course, exactly the point. If you have ever needed one bake that captures the entire spirit of Easter in a single slice, this is it.
What makes Easter egg hunt blondies particularly brilliant as a holiday bake is the combination of simplicity and visual impact. The blondie base itself — built on browned butter, brown sugar, and vanilla with just enough flour to hold it together — is one of the most forgiving bakes in existence. It is nearly impossible to ruin if you follow a few key principles, and it tastes extraordinary even when it looks rustic and imperfect. The candy eggs on top do all the decorative heavy lifting, turning a simple tray bake into something that looks like it required far more effort and artistry than it actually did.
I have been making versions of these every Easter for years — for school bake sales, for family gatherings, for the afternoon when everyone comes back inside from the egg hunt itself and needs something sweet and satisfying before the main event of the day. Every single time, the blondies disappear before I have had a chance to photograph them properly. The combination of that deeply caramelised, chewy blondie base and the crunch of the candy shell on the Easter eggs is genuinely irresistible, and the festive colours make them feel special in a way that a plain blondie simply does not.
This guide gives you everything — the full ingredient list with the reasoning behind each choice, the step-by-step instructions with the details that make the difference between a good blondie and a transcendent one, the pro tips, the mistakes to avoid, storage and serving ideas, a complete FAQ, and a full nutrition breakdown. Everything you need for the best Easter egg hunt blondies you have ever made is right here.
What Makes Easter Egg Hunt Blondies Different from Regular Blondies
A standard blondie is already a wonderful thing — buttery, chewy, and rich with brown sugar flavour. Easter egg hunt blondies take that foundation and elevate it in two specific ways that make them genuinely special rather than just a blondie with things pressed on top.
The first is the browned butter base. Regular blondies use melted butter. This recipe uses butter that has been cooked past the melting point until the milk solids turn golden-brown and develop a complex, nutty, almost toffee-like aroma. The French call this beurre noisette — hazelnut butter — because of the faint nutty quality it develops. In a blondie, which already relies heavily on caramelised sugar flavour, browned butter amplifies that caramel note dramatically and adds a depth of flavour that makes people stop mid-bite and ask what is different about these compared to regular blondies.
The second is the specific combination of chocolate and candy that goes into and on top of the batter. White chocolate chips folded into the batter melt during baking and create creamy pockets of sweetness throughout the interior. The candy-coated mini chocolate Easter eggs pressed on top add colour, visual festivity, a satisfying crunch from the candy shell, and a second chocolate element that plays beautifully against the butterscotch base. Together these elements create a bake that is more layered and interesting in both texture and flavour than any plain blondie.
Ingredients
For the Brown Butter Blondie Base
- 170g (¾ cup / 1½ sticks) unsalted butter
- 200g (1 cup, packed) light brown sugar
- 100g (½ cup) granulated white sugar
- 2 large eggs, at room temperature
- 1 large egg yolk, at room temperature (adds richness and fudginess)
- 2 teaspoons pure vanilla extract
- 1 teaspoon fine sea salt
- 210g (1¾ cups) all-purpose flour
- ½ teaspoon baking powder
- ¼ teaspoon bicarbonate of soda (baking soda)
For the Mix-ins and Topping
- 150g (1 cup) white chocolate chips or roughly chopped white chocolate
- 100g (½ cup) milk chocolate chips (optional — adds depth to the base)
- 250g (approximately 2 cups) candy-coated mini chocolate Easter eggs — Mini Eggs, Cadbury Mini Eggs, or similar
- 2 tablespoons rainbow sprinkles or pastel nonpareils (optional — adds to the festive visual)
- Flaky sea salt for finishing (optional but highly recommended)
Optional Additions for Variation
- 80g (½ cup) roughly chopped macadamia nuts or pecans for texture
- 1 teaspoon espresso powder added to the batter — amplifies the chocolate flavour without tasting like coffee
- Zest of one lemon — adds a fresh, springlike note that complements the sweet base

Step-by-Step Instructions
Step 1: Prepare Your Pan and Preheat
Preheat your oven to 180°C (350°F). Line a 9×13-inch baking pan with parchment paper, leaving an overhang of at least 2 inches on the two long sides — this overhang acts as handles to lift the entire blondie slab out of the pan cleanly after baking. Grease the parchment lightly with butter or baking spray. If you want thicker blondies with a more fudgy center, use an 8×8-inch or 9×9-inch pan and increase the baking time by 8–10 minutes — the smaller pan produces a taller, denser, more brownie-like result that many people prefer. Set the prepared pan aside.

Step 2: Brown the Butter
This step takes approximately five minutes and transforms the entire flavour profile of the finished blondie. Place the butter in a medium light-coloured saucepan over medium heat — light-coloured is important because it allows you to see the colour of the milk solids as they change. Melt the butter, stirring occasionally. Once melted, it will begin to foam and spit as the water content evaporates. Continue cooking and stirring, watching carefully. After about 3–4 minutes, the foam will subside and you will see golden-brown flecks forming at the bottom of the pan — these are the caramelised milk solids. The butter will smell intensely nutty and caramelised. At that exact moment, pour the browned butter immediately into a large heatproof mixing bowl to stop the cooking. The residual heat in the pan will continue to darken the butter even after you remove it from the heat, so pour it out the instant you see golden-brown flecks rather than waiting until it looks deeply brown. Scrape every last drop of the brown milk solids into the bowl — those flecks are where most of the flavour lives.
Allow the browned butter to cool for 10 minutes until it is warm but not hot. If you add the sugars to hot butter, they can partially cook and create a grainy texture. Warm is the target — warm enough to dissolve the sugar but cool enough not to cook the eggs when they are added.

Step 3: Mix the Wet Ingredients
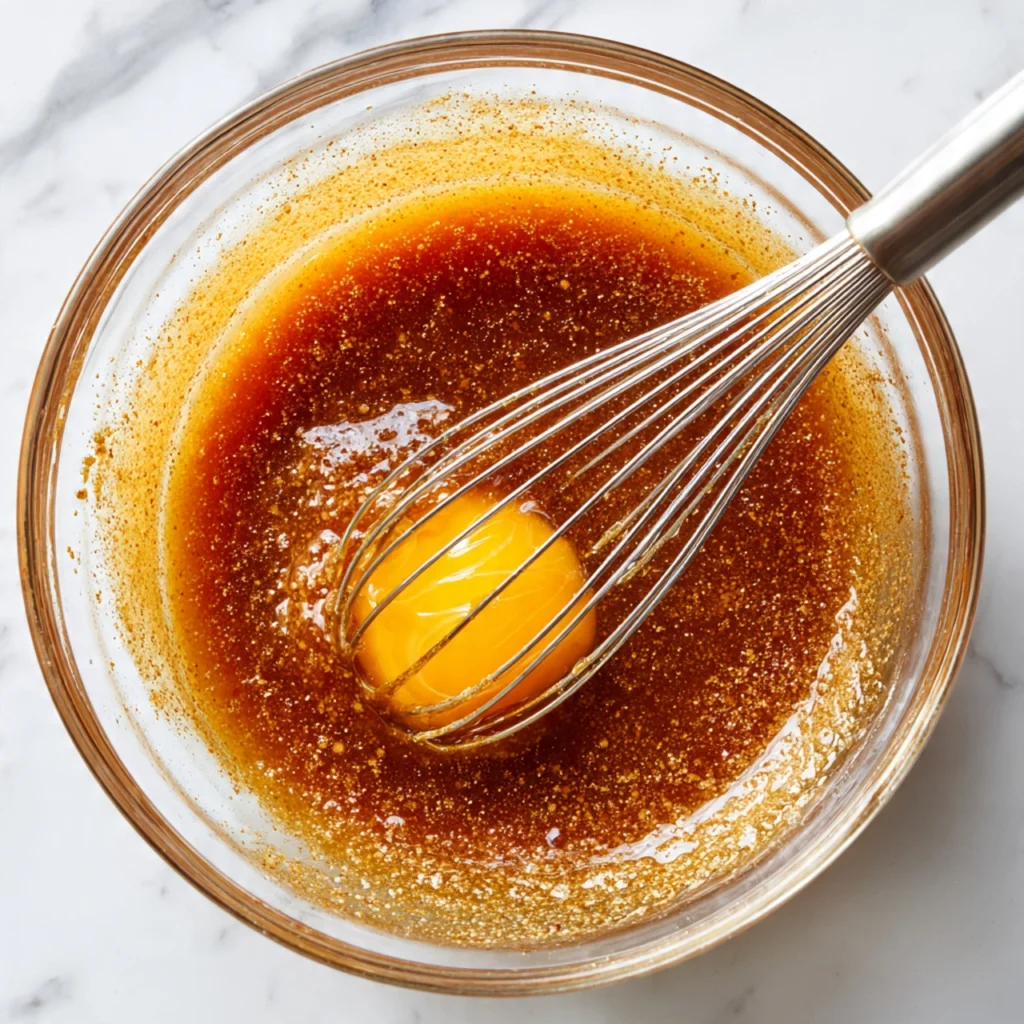
Add both the light brown sugar and granulated sugar to the warm browned butter. Whisk vigorously for about 90 seconds until the sugars are completely combined with the butter and the mixture looks smooth, glossy, and slightly thickened. The mixture will not be silky smooth at this point — some graininess from undissolved sugar crystals is normal and expected.
Add the eggs and extra egg yolk one at a time, whisking well after each addition. The additional egg yolk is what gives Easter egg hunt blondies their characteristic fudgy, slightly dense center rather than a cakey one — do not skip it. Add the vanilla extract and fine sea salt and whisk until the mixture is completely smooth, glossy, and slightly ribbony when the whisk is lifted. At this stage the batter should look thick, golden-brown, and deeply caramelised in colour from the browned butter and brown sugar.
Step 4: Add the Dry Ingredients
Sift the all-purpose flour, baking powder, and bicarbonate of soda together directly over the wet ingredient bowl. Using a wide rubber spatula or wooden spoon, fold the dry ingredients into the wet mixture using slow, deliberate strokes. Mix until just combined — stop the moment you can no longer see dry flour streaks. Do not over-mix. Over-mixing develops gluten in the flour which produces a tough, bready blondie instead of a tender, chewy one. A few turns of the spatula after the flour is incorporated is too many. The batter will be thick and slightly stiff — this is exactly right.

Step 5: Fold in the Chocolate Chips
Add the white chocolate chips and milk chocolate chips (if using) to the batter and fold them in gently with the spatula using three or four strokes. The chips should be evenly distributed but do not need to be perfectly uniform — some clustering is fine and actually desirable for creating pockets of melted chocolate in the finished blondie. If you are adding any nuts, espresso powder, or lemon zest, fold them in at this stage.

Step 6: Spread, Decorate and Bake
Transfer the blondie batter to the prepared pan and spread it into an even layer using the spatula or an offset spatula. Spend a moment making sure the batter reaches the corners and edges of the pan evenly — uneven batter means uneven baking, with the thin edges overbaking while the thick center is still underdone.
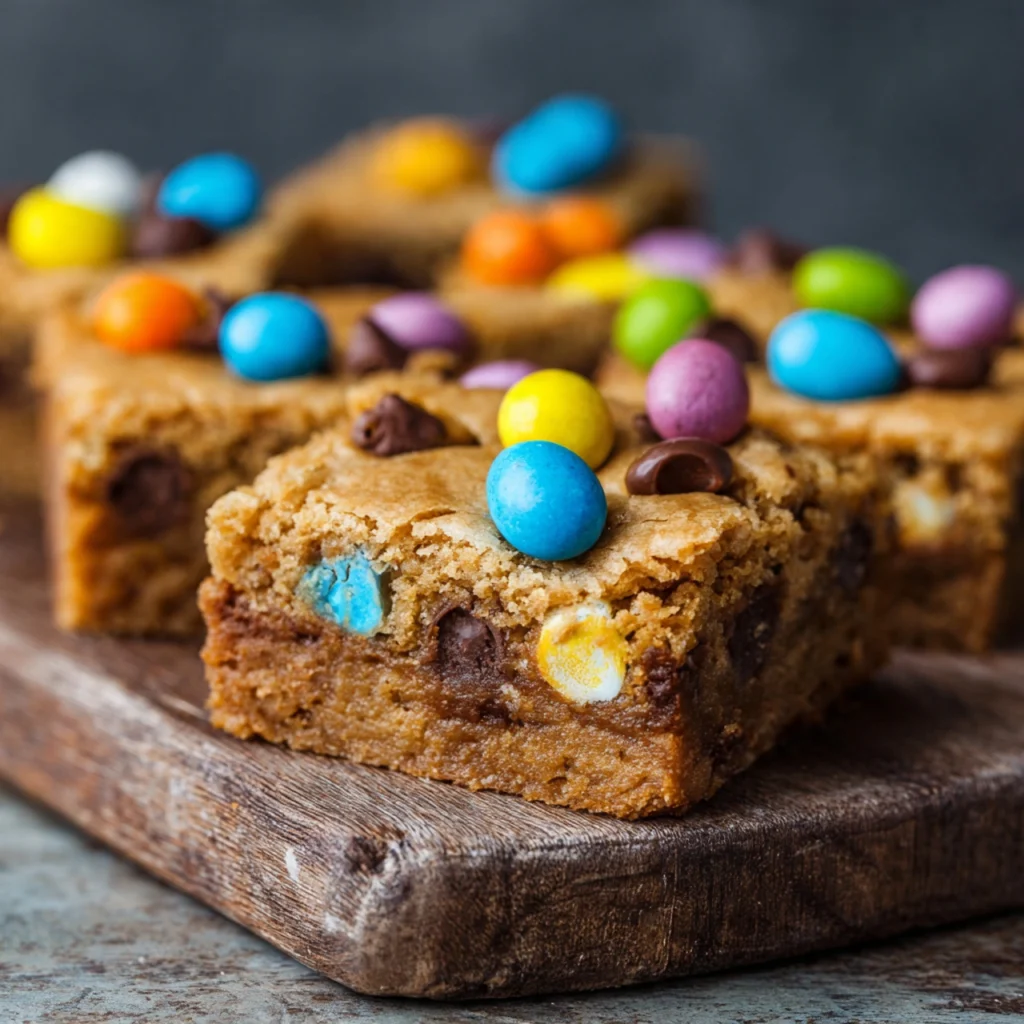
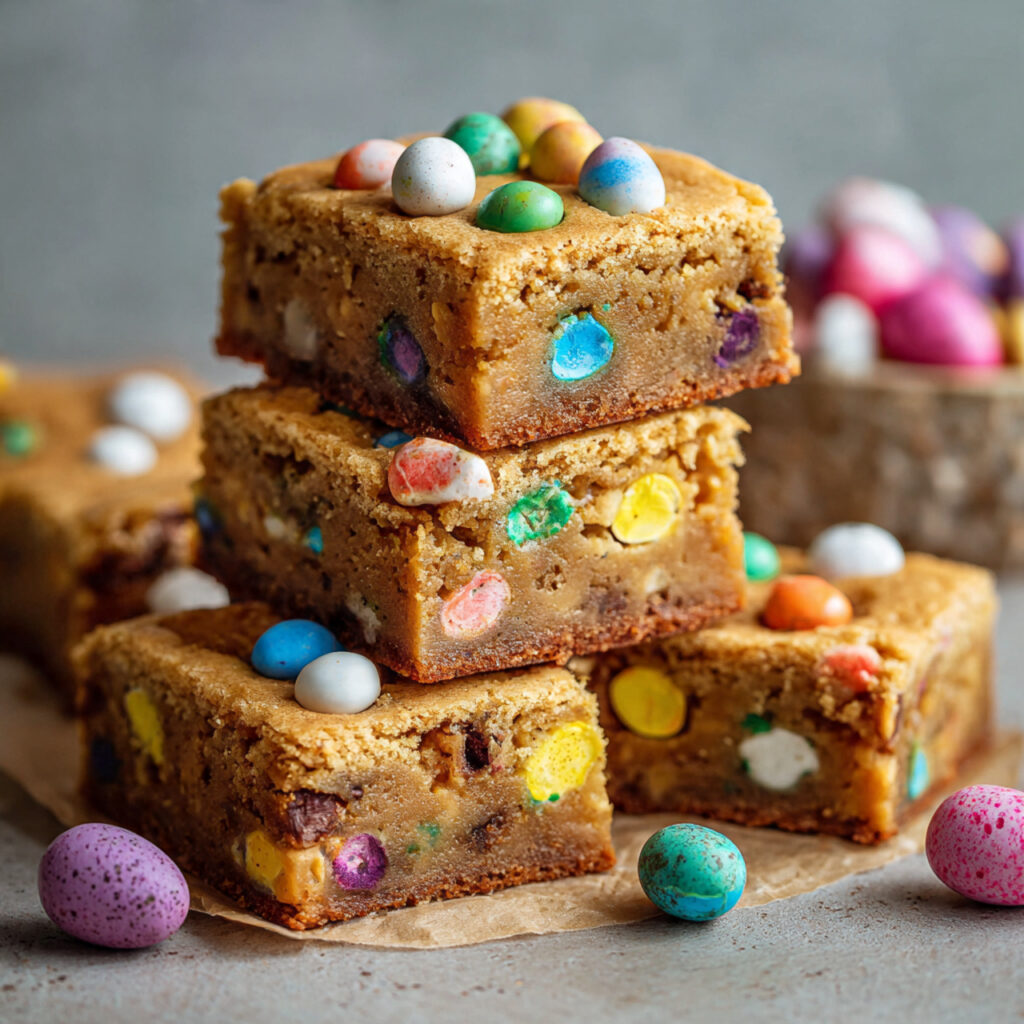
Now for the most visually satisfying part of the entire recipe — press the candy-coated Easter eggs generously and evenly across the surface of the batter. You want full, abundant coverage — this is not the time for restraint. Use all 250g of the candy eggs, pressing each one gently into the batter so it is half-submerged and will hold in place during baking rather than rolling off. The colours should be distributed as evenly as possible across the entire surface. Scatter the rainbow sprinkles or pastel nonpareils over the top if using. Finish with a light scatter of flaky sea salt if desired.
Bake in the preheated oven for 22–26 minutes. The blondies are done when the top is set and golden-brown across the surface, the edges have pulled away very slightly from the sides of the pan, and a toothpick inserted in the center comes out with moist crumbs rather than wet batter — a few moist crumbs are ideal, completely clean means over-baked. The center should still look very slightly underdone when you pull the pan — the residual heat will finish it as it cools.

Step 7: Cool, Lift and Slice
Remove the pan from the oven and place it on a wire rack. Allow the blondies to cool in the pan for at least 30 minutes before attempting to lift them out — hot blondies are fragile and will break if handled too soon. Once they have cooled for 30 minutes, use the parchment overhang to lift the entire slab cleanly out of the pan and onto the wire rack. Allow to cool completely — a minimum of one hour from the time the pan came out of the oven — before slicing. Cutting into warm blondies gives you ragged, messy edges and the texture has not fully set. Completely cooled blondies slice cleanly with a sharp knife and the interior is at its best fudgy consistency. Cut into bars, squares, or irregular pieces depending on how you plan to serve them.
Pro Tips for the Perfect Easter Egg Hunt Blondies
Watch the Butter Like a Hawk
Browned butter goes from perfect to burnt in approximately thirty seconds. Once you see the golden-brown flecks forming at the bottom of the pan and smell that nutty caramel aroma, take the pan off the heat and pour it immediately. Never walk away from browning butter. Use a light-coloured pan so you can see the colour change — a dark non-stick pan hides the colour of the milk solids until it is too late.
Room Temperature Eggs Are Non-Negotiable
Cold eggs added to warm browned butter can cause the fat to seize and separate, creating a greasy, broken batter with a visible oily layer that does not incorporate properly. Take your eggs out of the refrigerator at least 30 minutes before starting the recipe. If you forget, place the uncracked eggs in a bowl of warm (not hot) water for 5 minutes — they will come to room temperature quickly.
Measure Flour by Weight, Not Volume
Flour is the most commonly mis-measured ingredient in baking, and the consequences in blondies are significant. Too much flour produces a dry, cakey bar rather than a fudgy, chewy one. Spooning flour into a measuring cup and packing it can add 20–30% more flour than the recipe intends. Use a kitchen scale and measure 210g precisely — the result will be noticeably better than a volume measurement.
Under-Bake Slightly and Always
The single most important baking tip for blondies is to pull them out of the oven when they still look very slightly underdone in the center. The center should look barely set and the toothpick should come out with moist crumbs, not wet batter but not completely clean either. The carry-over cooking as the blondies cool in the pan finishes the center to the perfect fudgy consistency. Over-baked blondies are dry and crumbly and cannot be rescued.
Press the Eggs in After Spreading, Not During
If you fold the candy Easter eggs into the batter before spreading, they sink to the bottom during baking and the beautiful festive topping effect is completely lost. Always spread the batter first, then press the eggs into the top surface of the batter individually. Half-submerge each one so they hold in place — eggs that sit on the surface without being pressed in will roll during baking.
Cool Completely Before Cutting
I cannot emphasise this strongly enough. Blondies that are cut warm have ragged edges, a gooey rather than fudgy texture, and the interior has not fully set. An hour of patience produces a completely different result from cutting at 30 minutes. If you need them for an event, make them the night before and cut them the following morning — overnight-cooled blondies have an even better texture than same-day ones.
Common Mistakes to Avoid
Burning the brown butter. The line between perfectly browned and burnt is very thin and the flavour difference is dramatic — burnt butter tastes bitter and acrid and ruins the entire batch. Watch it constantly, use a light-coloured pan, and pour it out the instant you see golden-brown flecks. When in doubt, pull it early — slightly under-browned butter still tastes good, burnt butter does not.
Over-mixing the batter after adding flour. Every turn of the spatula after the flour goes in develops more gluten. Stop the moment the flour is incorporated — a few remaining minor streaks of flour are better than over-developed gluten. Over-mixed blondie batter produces tough, bready bars with a chewy texture that comes from gluten rather than the desirable chewy texture that comes from properly baked sugar and fat.
Using cold eggs. As discussed in the pro tips, cold eggs can break the warm browned butter emulsion. Always use room temperature eggs and add them one at a time to maintain the emulsion.
Skipping the parchment overhang. Trying to cut blondies in the pan or remove them without proper parchment handles is a recipe for broken bars and frustration. The two-inch overhang on each long side takes ten seconds extra to prepare and saves the entire presentation.
Cutting too soon. The most common mistake of all. The smell of freshly baked blondies is almost physically compelling and the urge to cut into them immediately is very strong. Resist it completely. One hour minimum. Overnight ideally.
Pressing the candy eggs in too deeply. The Easter eggs should be half-submerged — visible and prominent on the surface, sitting above the batter rather than buried in it. Pressed too deep, they disappear into the blondie during baking and you lose the beautiful festive visual effect. Press gently until they are stable, not until they are hidden.
Using the wrong size pan without adjusting time. A 9×13-inch pan produces thin blondies that bake in 22–26 minutes. An 8×8-inch pan produces thick blondies that need 32–38 minutes. Using a smaller pan without increasing the baking time produces raw centers. Always adjust your time to your pan size.
Storage and Serving Suggestions
Easter egg hunt blondies store beautifully and are genuinely one of the best make-ahead Easter bakes available. Once completely cooled and cut, layer the bars between sheets of parchment paper in an airtight container. Store at room temperature for up to 4 days — the texture actually improves on day two as the moisture redistributes through the bars and the flavour deepens. Refrigerate for up to 1 week, though bring them back to room temperature before serving as cold blondies are firmer and the flavour is slightly muted.
For freezing, wrap individual bars tightly in plastic wrap and place in a freezer-safe zip-lock bag or container. Freeze for up to 3 months. Thaw at room temperature for 30–45 minutes before serving. The texture after freezing and thawing is slightly different from fresh — a little denser and slightly more compact — but still very good. The candy eggs maintain their appearance and shell texture well after freezing.
For serving at an Easter gathering, arrange the bars on a tiered cake stand or a large rustic wooden board for a beautiful display — the colourful candy eggs make the presentation immediately eye-catching and festive with no additional decoration required. Individual bars wrapped in cellophane bags and tied with pastel ribbon make wonderful Easter gifts or party favours. For a children’s party, cut them into smaller bite-sized squares rather than large bars — the miniature format makes them easier for small hands and means everyone can have two or three without guilt.
For an elevated dessert presentation, serve a warmed bar alongside a scoop of vanilla bean ice cream with a drizzle of salted caramel sauce — the warm blondie, cold ice cream, and sticky caramel is one of the genuinely great simple dessert combinations and it works beautifully with the butterscotch base of the blondie.
Frequently Asked Questions
Q1: Can I make Easter egg hunt blondies without browning the butter? Yes, you can use regular melted butter and the blondies will still be excellent — chewy, sweet, and well-flavoured. The brown butter adds a significant layer of nutty, caramelised depth that elevates the overall flavour considerably, but it is not structurally essential. If you are short on time or nervous about the browning process, melt the butter gently and proceed with the recipe. The result will be a very good blondie rather than an exceptional one. Once you make the browned butter version, it is difficult to go back.
Q2: What type of candy Easter eggs work best for this recipe? Cadbury Mini Eggs are the gold standard for this recipe — their thick, hard candy shell holds its shape and colour brilliantly during baking, the chocolate interior is excellent quality, and the pastel colour range is perfectly Easter. Other candy-coated mini chocolate eggs from any quality confectionery brand work equally well. Avoid large hollow Easter eggs — they are too big, too fragile, and will melt or collapse during baking. Avoid soft-shelled or foil-wrapped chocolate eggs — they do not hold their shape at baking temperature. Jelly beans can be used for a different visual effect but they melt and become sticky rather than holding their shape.
Q3: Can I make these blondies gluten-free? Yes, with a direct substitution. Replace the all-purpose flour with a good quality gluten-free all-purpose flour blend in the same weight measurement — 210g. Blends that contain xanthan gum produce the best structural result. The texture will be very slightly different — slightly more crumbly at the edges — but the interior will still be fudgy and the flavour will be essentially identical. Ensure that your chocolate chips and candy eggs are also certified gluten-free if serving to someone with coeliac disease or serious gluten sensitivity.
Q4: My blondies came out cakey rather than fudgy. What went wrong? Cakey blondies are almost always caused by one of three things: too much flour (measured by volume rather than weight), over-mixing after the flour was added which developed too much gluten, or over-baking. The fix for future batches is to weigh the flour precisely at 210g, stop mixing the moment the flour is incorporated, and pull the pan from the oven when the center still looks very slightly underdone. Also check that you used the extra egg yolk — skipping it removes a significant amount of the fat and richness that creates the fudgy texture.
Q5: Can I add other mix-ins to Easter egg hunt blondies? Absolutely — the base recipe is designed to be a starting point. Roughly chopped macadamia nuts add a rich, buttery crunch that pairs beautifully with the white chocolate and caramel base. Shredded coconut adds a slightly tropical note and textural interest. Roughly chopped dried apricots add a fruity, tangy element that works surprisingly well with the brown butter flavour. Additional sprinkles or confetti in pastel colours add to the festive visual effect. The only thing to be cautious about is adding too much volume of mix-ins — the batter is thick and can only support so many additions before the structural integrity of the bar is compromised. Keep total mix-ins to approximately 200g across all additions.
Q6: How do I get clean, neat slices? Three things produce clean slices: cooling completely — preferably overnight, using a sharp knife rather than a serrated one, and wiping the blade clean with a damp cloth between each cut. For the cleanest possible edge, chill the fully cooled blondie slab in the refrigerator for 30 minutes before slicing — cold blondies hold their shape and slice more cleanly than room-temperature ones. Score the top lightly with the knife before making the full cut to guide the blade along a straight line.
Q7: Can I double this recipe for a crowd? Yes — this recipe doubles perfectly for a larger event. Use an 18×26-inch sheet pan (a half-sheet pan) or two 9×13-inch pans baked simultaneously. The baking time remains roughly the same for the same thickness of batter. If using a very large single pan, rotate it 180 degrees halfway through baking to ensure even browning across the entire surface.
Nutrition Information (Approximate Per Bar)
Based on 24 bars cut from a 9×13-inch pan using the full recipe with white chocolate chips and candy Easter eggs, without optional additions.
| Nutrient | Amount Per Bar |
|---|---|
| Calories | ~245 kcal |
| Total Fat | 11g |
| Saturated Fat | 7g |
| Cholesterol | 45mg |
| Sodium | 120mg |
| Total Carbohydrates | 34g |
| Dietary Fiber | 0g |
| Total Sugars | 26g |
| Added Sugars | 24g |
| Protein | 3g |
| Iron | 4% DV |
| Calcium | 3% DV |
| Vitamin A | 5% DV |
Note: Values are approximate and will vary based on specific chocolate chip and candy egg brands used, exact bar size when cut, and whether optional ingredients such as nuts, espresso powder, or additional toppings are included.
Conclusion
There are bakes that are technically impressive and bakes that make people genuinely happy the moment they see them, and the best Easter bakes manage to be both simultaneously. Easter egg hunt blondies belong firmly in that category. The brown butter base is a genuinely sophisticated piece of technique that produces a flavour most people have never experienced in a bar cookie before. The candy eggs on top are pure festive joy — colourful, cheerful, and immediately communicating that this is a special occasion bake made with thought and care.
The recipe is not complicated. It requires attention in a few specific moments — watching the butter carefully as it browns, measuring the flour by weight, stopping the mixing the moment the flour is incorporated, and exercising patience during the cooling period — but none of it is difficult. The techniques are accessible to any level of home baker and the results are consistently excellent when the key principles are followed.
Make these for Easter this year. Make them the day before so they have time to cool properly and the flavours have time to develop overnight. Cut them into generous bars, arrange them on your most festive platter, and watch them disappear before the chocolate Easter eggs from the actual egg hunt have even been fully counted.
That is the best possible outcome for any Easter bake — and Easter egg hunt blondies deliver it every single time.
Now go brown that butter.

Easter Egg Hunt Blondies
Ingredients
Equipment
Method
- Preheat your oven to 180°C (350°F). Line a 9×13-inch baking pan with parchment paper leaving at least a 2-inch overhang on both long sides to act as lifting handles. Grease the parchment lightly with butter or baking spray. Set the prepared pan aside.
- Place the butter in a medium light-colored saucepan over medium heat. Melt the butter, stirring occasionally. Continue cooking and stirring as the butter foams and the water evaporates. After 3–4 minutes, golden-brown flecks will form at the bottom and the butter will smell intensely nutty and caramelised. Immediately pour the browned butter into a large heatproof mixing bowl, scraping every last brown milk solid fleck into the bowl. Allow to cool for 10 minutes until warm but not hot.
- Add both the light brown sugar and granulated sugar to the warm browned butter. Whisk vigorously for about 90 seconds until fully combined, smooth, and slightly thickened. Add the eggs and extra egg yolk one at a time, whisking well after each addition. Add the vanilla extract and fine sea salt and whisk until the mixture is completely smooth, glossy, and slightly ribbony when the whisk is lifted.
- Sift the all-purpose flour, baking powder, and bicarbonate of soda directly over the wet ingredient bowl. Using a wide rubber spatula, fold the dry ingredients into the wet mixture using slow deliberate strokes. Mix until just combined — stop the moment you can no longer see dry flour streaks. Do not over-mix. The batter will be thick and slightly stiff.
- Add the white chocolate chips and milk chocolate chips (if using) to the batter and fold in gently with three or four strokes of the spatula until evenly distributed. If adding optional nuts, espresso powder, or lemon zest, fold them in at this stage.
- Transfer the blondie batter to the prepared pan and spread into an even layer reaching the corners and edges. Press the candy-coated Easter eggs generously and evenly across the entire surface of the batter, pressing each one gently until half-submerged. Scatter rainbow sprinkles if using and finish with a light scatter of flaky sea salt. Bake for 22–26 minutes until the top is set and golden-brown, the edges have pulled away slightly from the pan, and a toothpick inserted in the center comes out with moist crumbs — not wet batter and not completely clean.
- Remove the pan from the oven and place on a wire rack. Cool in the pan for at least 30 minutes, then use the parchment overhang to lift the entire blondie slab onto the wire rack. Cool completely for a minimum of one hour — overnight is ideal — before slicing into bars with a sharp knife. For the cleanest slices, refrigerate for 30 minutes before cutting and wipe the blade between each cut.