Gluten Free Thumbprint Cookies: The Classic Holiday Cookie Everyone Can Enjoy

Introduction
Gluten free thumbprint cookies are proof that giving up gluten doesn’t mean giving up anything that actually matters at the cookie tin. These little gems — buttery, slightly crisp on the outside, tender in the center, and filled with a jewel-bright pool of jam or a glossy swirl of chocolate — are one of the most beloved cookies in existence, and this gluten-free version is every bit as good as the original. Actually, after years of making both, I’d argue this version might be better.
The thumbprint cookie has a long, beloved history on holiday trays and everyday dessert plates alike. Part of what makes it so enduring is its simplicity: a shortbread-style dough, a well pressed into the center, and a filling that can be swapped to suit anyone’s preference. The challenge, when working without wheat flour, is recreating that signature melt-in-your-mouth texture without the binding properties of gluten. Get it wrong and you end up with cookies that crumble apart before the jam even has a chance to set. Get it right — which is exactly what this recipe does — and you have something genuinely magical.
This recipe uses a blend of almond flour and a small amount of tapioca starch to achieve the ideal structure: cookies that hold together cleanly, press without cracking, and deliver a delicate, slightly nutty flavor that pairs beautifully with everything from classic raspberry jam to lemon curd to dark chocolate ganache. They’re naturally gluten-free without tasting like a compromise.
Whether you’re baking for someone with celiac disease, a gluten sensitivity, or you’re simply curious about what almond flour can do, these gluten free thumbprint cookies will earn a spot in your permanent rotation.
Why You’ll Love This Recipe
There are a lot of reasons this recipe works, but here are the ones that keep me coming back to it every single season.
They taste genuinely indulgent. Almond flour gives these cookies a richness that all-purpose flour simply can’t match — a slight nuttiness and a natural fat content that creates an almost melt-in-your-mouth tenderness.
The filling possibilities are endless. Raspberry, strawberry, apricot, fig, lemon curd, Nutella, dark chocolate ganache, salted caramel — this dough works with all of them. You can make a single batch and fill each cookie differently for a stunning variety tray.
They’re naturally gluten-free, not modified. This recipe wasn’t adapted from a traditional version by swapping out flour for a blend of twelve mystery starches. It was built around almond flour from the ground up, which means the texture and flavor are intentional and excellent.
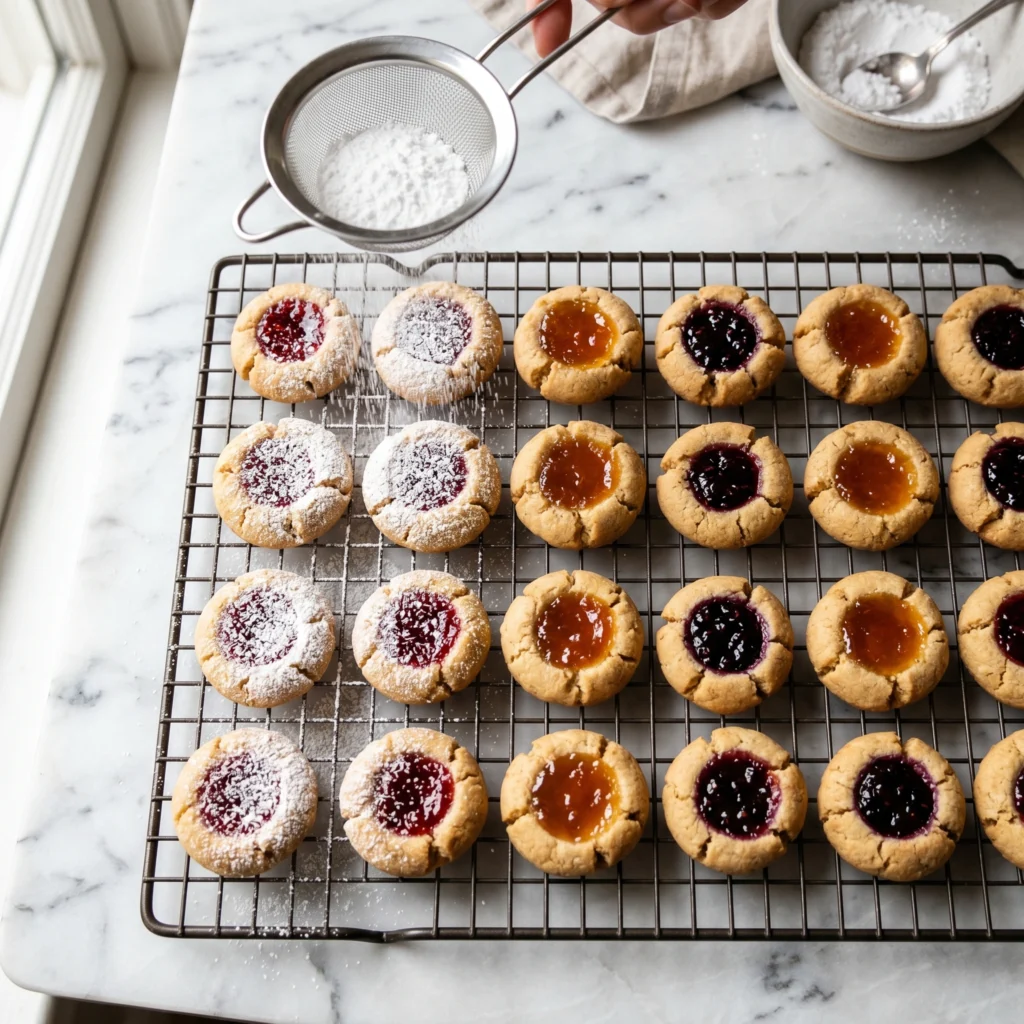
They look beautiful. The jewel-colored jam centers, the golden edges, the optional dusting of powdered sugar — these cookies photograph beautifully and impress on any table.
They come together quickly. No chilling required (beyond a brief rest). No rolling, no cutters, no complex techniques. This is a mix-scoop-press-bake situation, and it’s ready from start to finish in about 35 minutes.
Ingredients
For the Cookie Dough
- 2 cups (200g) blanched almond flour (not almond meal — see tips)
- 3 tablespoons (24g) tapioca starch (also called tapioca flour)
- ¼ teaspoon fine sea salt
- ¼ teaspoon baking powder (ensure it’s certified gluten-free)
- ½ cup (113g) unsalted butter, softened to room temperature
- ⅓ cup (65g) granulated sugar
- 1 large egg yolk, room temperature
- 1 teaspoon pure vanilla extract
- ¼ teaspoon almond extract (optional but highly recommended)
For the Filling
- ½ cup jam or preserves of your choice — raspberry, strawberry, apricot, and fig all work beautifully
- OR ¼ cup chocolate ganache, Nutella, lemon curd, or salted caramel as an alternative
Optional Finishing Touches
- Powdered sugar for dusting (use certified gluten-free)
- Flaky sea salt for chocolate-filled cookies
- Finely chopped pistachios, pecans, or almonds rolled into the outside of each cookie ball before pressing

Equipment You’ll Need
- Two large mixing bowls
- Hand mixer or stand mixer with paddle attachment
- Rubber spatula
- Medium cookie scoop (1.5 tablespoon size) or a tablespoon measure
- Two baking sheets lined with parchment paper
- Wire cooling rack
- ¼ teaspoon measuring spoon or your thumb for pressing the wells
- Small saucepan or microwave (if making ganache)
Step-by-Step Instructions
Step 1: Preheat and Prep
Preheat your oven to 350°F (175°C). Line two baking sheets with parchment paper and set aside. If your butter, egg yolk, or jam have been refrigerated, pull them out now. The butter needs to be genuinely soft — not melted, not cold, but yielding easily to a finger press.
Step 2: Mix the Dry Ingredients
In a medium bowl, whisk together the blanched almond flour, tapioca starch, salt, and baking powder until evenly combined and free of any lumps. Almond flour can clump, so take an extra moment here to break up any packed sections. Set aside.
Step 3: Cream the Butter and Sugar
In a large mixing bowl, beat the softened butter and granulated sugar together on medium-high speed for 2 to 3 minutes until the mixture is pale, fluffy, and noticeably lighter in color. This creaming step is important even for gluten-free cookies — it incorporates air into the dough that helps give the cookies a tender, slightly lifted texture rather than a dense, flat one.

Step 4: Add Egg Yolk and Extracts
Add the egg yolk, vanilla extract, and almond extract (if using) to the creamed butter. Beat on medium speed for about 1 minute until fully incorporated and smooth. Scrape down the sides and bottom of the bowl with a rubber spatula to make sure everything is evenly combined.
Step 5: Add the Dry Ingredients
Add the dry ingredient mixture to the wet ingredients all at once. Mix on low speed until a soft, cohesive dough forms. It will be slightly softer than traditional shortbread dough — that’s normal and correct. If the dough feels extremely sticky and won’t hold its shape when rolled into a ball, refrigerate it for 10 to 15 minutes before proceeding. In most cases with properly measured almond flour, this won’t be necessary.

Step 6: Portion and Roll
Using a 1.5-tablespoon cookie scoop or a regular tablespoon measure, portion the dough into even balls. Roll each portion between your palms into a smooth, round ball. Place them on the prepared baking sheets, spacing each ball at least 1.5 inches apart. These cookies don’t spread dramatically, but they do expand slightly and you want clean edges on each one.
Step 7: Press the Wells
Using your thumb, the rounded back of a ¼ teaspoon measuring spoon, or the end of a wooden spoon handle, press a well into the center of each cookie ball. Press firmly but not all the way through — you want a deep, defined well that can hold the filling, but the base of the cookie should remain intact. If the edges crack slightly during pressing, simply use your fingers to gently press them back together.

Step 8: Fill the Cookies
Spoon approximately ½ teaspoon of jam or your chosen filling into each well. Don’t overfill — jam bubbles and spreads slightly during baking, and overfilled cookies will overflow messily onto the parchment. If you’re using a thick filling like Nutella or ganache, you can fill these before or after baking (see tips section for guidance).
Step 9: Bake
Bake for 12 to 14 minutes, until the edges of the cookies are lightly golden and the centers look set. The cookies will still appear soft when they come out of the oven — this is correct. They firm up significantly as they cool. Do not overbake; overbaked almond flour cookies can become dry and crumbly rather than tender and short.
Step 10: Cool and Finish
Allow the cookies to cool on the baking sheet for 10 full minutes before attempting to transfer them to a wire rack. Almond flour cookies are more fragile when hot than traditional cookies, and moving them too soon risks cracking or breaking. Once cooled completely, dust lightly with powdered sugar if desired and serve.
Pro Tips for Gluten Free Thumbprint Cookies
Use blanched almond flour, not almond meal. This distinction is critical. Almond meal is made from whole almonds with the skins on and produces a coarser, denser, darker cookie with a slightly bitter edge. Blanched almond flour is made from skinned almonds and is finely milled, producing a pale, delicate, tender cookie with a clean, mild flavor. Brands like Bob’s Red Mill Super-Fine or Anthony’s Blanched Almond Flour are reliable choices.
Measure your almond flour by weight, not volume. Almond flour is notorious for packing differently depending on how it’s stored and scooped. A packed cup can weigh significantly more than a properly spooned-and-leveled cup, throwing off the dough’s consistency. 200g on a kitchen scale is the most reliable measurement.
The almond extract makes a difference. Just a quarter teaspoon of almond extract deepens the nuttiness of the dough in a way that feels intentional and sophisticated rather than artificial. It’s subtle, but cookies made with it taste notably more complex than those without.
Add texture to the outside. Before pressing the wells, roll each ball of dough in finely chopped nuts — pistachios, pecans, walnuts, or slivered almonds all work beautifully. This adds visual interest, a contrasting crunch, and helps reinforce the structure of each cookie during baking.
For chocolate or ganache filling, fill after baking. Jam is stable enough to go into the well before the oven because it sets under heat. Chocolate ganache, Nutella, and lemon curd are best added after baking, spooned into the warm-but-not-hot wells so they melt slightly and settle into a glossy finish without burning.
Re-press the wells immediately after baking. As cookies bake, the dough puffs slightly and the wells can shrink or close a little. The moment the tray comes out of the oven, use the back of a measuring spoon to gently re-press each well before adding post-bake fillings or while jam is still molten. This restores the clean, defined well shape.
Chill the dough if needed. If your kitchen is warm or your butter was slightly too soft, the dough may feel a bit tacky. A 15-minute rest in the refrigerator before rolling firms everything up and makes shaping much easier.
Common Mistakes to Avoid
Using almond meal instead of blanched almond flour. I said it in the tips and I’m saying it here too, because it’s that important. These are not interchangeable. Almond meal will give you cookies with a noticeably different color, texture, and flavor — and not in a good way.
Overfilling the wells. Half a teaspoon of filling per cookie is the sweet spot. More than that and you’ll end up with jam running down the sides and pooling on the parchment. It looks messy, and the overflow burns.
Moving the cookies while they’re still hot. Almond flour cookies are fragile straight from the oven. Give them a full 10 minutes on the pan before you even think about a spatula. Patience here prevents broken cookies.
Overbaking. Golden edges and a slightly underdone-looking center is the target. If the entire surface of the cookie looks golden, they’ve gone too far. Almond flour burns more easily than wheat flour, and the line between perfectly baked and too dark is a narrow one.
Skipping the tapioca starch. Tapioca starch acts as a binder in this recipe, replacing some of the structural role that gluten plays in traditional shortbread. Without it, the cookies are more prone to crumbling. It also contributes a slight chew that’s really pleasant in the final texture.
Using cold butter. Cold butter won’t cream properly with the sugar, leaving you with a dense, unevenly textured dough rather than the light, airy base these cookies need. Softened butter — truly room temperature — is non-negotiable.
Pressing the wells too deep. If you push all the way through the dough ball, the base of the cookie will be paper-thin and will crack during baking. A firm, confident press that stops about ⅓ of the way through the ball is ideal.
Storage and Serving Suggestions
How to Store Gluten Free Thumbprint Cookies
Gluten free thumbprint cookies store very well at room temperature in an airtight container for up to 5 days. Layer them with parchment paper between rows to protect the jam and any powdered sugar dusting. Keep the container away from direct sunlight or heat, which can cause the jam filling to weep.
For longer storage, these cookies freeze beautifully. Arrange them in a single layer on a baking sheet and freeze until solid, then transfer to a freezer-safe airtight container or bag with parchment between layers. Freeze for up to 2 months. Thaw at room temperature for about 30 minutes before serving.
You can also freeze the unbaked dough balls — without the wells pressed in — and bake directly from frozen. Add 2 to 3 minutes to the baking time, press the wells after removing from the oven while still hot, and fill as directed.
How to Serve
At room temperature: These cookies are at their best served at room temperature, when the jam is softly set, the butter in the cookie has relaxed, and the almond flour’s natural richness is most pronounced.
On a holiday tray: Use multiple jam flavors and fillings to create a colorful, varied assortment. The jewel tones of raspberry, apricot, and blueberry against the golden cookies make for a genuinely stunning presentation.
As a gift: These cookies hold up well to transport when properly stored and make a thoughtful, impressive homemade gift — especially for friends and family with gluten sensitivities who often miss out on holiday baked goods.
With tea or coffee: The buttery, nutty cookie and fruity filling are a natural match for afternoon tea. They’re equally at home alongside a strong espresso, a spiced chai, or a glass of cold milk.
Dressed up for dessert: For a more formal presentation, plate two or three on a small dish, dust lightly with powdered sugar, and add a small scoop of vanilla ice cream alongside for a simple but elegant end to a dinner party.

Frequently Asked Questions (FAQ)
Are these cookies certified celiac-safe?
The recipe itself is gluten-free by ingredients, but whether they’re safe for someone with celiac disease depends on your specific ingredients and kitchen setup. Always verify that every ingredient — almond flour, baking powder, powdered sugar, jam — is labeled certified gluten-free, as cross-contamination during manufacturing can be a concern. Use dedicated gluten-free equipment and ensure your workspace is clean and free of wheat flour before beginning.
Can I use coconut flour instead of almond flour?
Coconut flour is not a direct substitute for almond flour in this recipe. Coconut flour is extremely absorbent — it soaks up liquid at a much higher rate — and requires a very different ratio of wet ingredients to work. Substituting it 1:1 will result in dry, crumbly cookies that won’t hold together. If you need a nut-free option, look for sunflower seed flour or oat flour (certified gluten-free) as closer alternatives, though the texture and flavor will differ.
Can I make these dairy-free as well as gluten-free?
Yes. Swap the unsalted butter for an equal amount of vegan butter (Earth Balance or Miyoko’s both work well in shortbread-style cookies) or refined coconut oil. The texture will be very slightly different — coconut oil produces a slightly crisper, more snappy cookie while vegan butter performs closest to the original. Make sure your chosen filling is also dairy-free.
My dough feels too sticky to roll. What should I do?
This usually means the butter was slightly too warm or the almond flour was loosely packed and you ended up with less than the recipe calls for. Refrigerate the dough for 15 to 20 minutes — this firms the butter back up and makes the dough much easier to handle. If after chilling it’s still very sticky, add one additional tablespoon of almond flour, mix gently, and try again.
Can I use jam with seeds, like raspberry?
Absolutely. Seeded jams like raspberry and strawberry work beautifully and are among the most traditional fillings for thumbprint cookies. If you prefer a smoother appearance and texture, use a seedless version of the same flavor. Both taste equally delicious — it’s purely a personal and visual preference.
How do I keep the jam from being too runny after baking?
Two things help here: first, use a good quality preserve or jam with a thick, set consistency rather than a syrupy one (higher fruit content, less added water). Second, don’t overfill the wells — ½ teaspoon is the right amount. If after baking the jam is still runny when cool, your jam may have a low pectin content. Try a different brand, or stir in a tiny pinch of cornstarch before filling.
Can I make gluten free thumbprint cookies without eggs?
Yes. The egg yolk in this recipe adds richness and helps bind the dough, but you can substitute it with one tablespoon of full-fat coconut cream or a flax egg (1 tablespoon ground flaxseed mixed with 3 tablespoons water, rested for 5 minutes). The cookies will be slightly more delicate and may need a few extra minutes of chilling before rolling, but they will hold together and taste wonderful.
Approximate Nutrition Information
Per serving, based on 1 cookie from a batch of 24. Values are estimates and will vary based on specific ingredients and fillings used.
| Nutrient | Amount Per Cookie |
|---|---|
| Calories | ~125 kcal |
| Total Fat | 9g |
| Saturated Fat | 3g |
| Cholesterol | 20mg |
| Sodium | 45mg |
| Total Carbohydrates | 10g |
| Dietary Fiber | 1g |
| Total Sugars | 6g |
| Protein | 2.5g |
These cookies are gluten-free and made with wholesome almond flour. Values will increase slightly with a chocolate ganache or Nutella filling versus a jam filling.
Conclusion
Gluten free thumbprint cookies are one of those recipes that genuinely earns the phrase “you won’t even know the difference” — except in this case, I’d actually go further. The almond flour base is so naturally rich, tender, and flavorful that this version of the thumbprint cookie stands entirely on its own merits, not just as a credible substitute for a wheat-flour original, but as a legitimately superior cookie that anyone would be happy to eat.
What I love most about this recipe, beyond the flavor and the ease, is what it represents on a table. For anyone who navigates a gluten-free diet, especially during the holidays when baked goods are everywhere and options are often limited, a plate of these cookies is a genuine gift. They’re included, not accommodated. They’re beautiful, not apologetic. And they taste every bit as indulgent as the cookie tin they’re sitting in.
Make them with raspberry for a classic look. Try apricot for something a little more sophisticated. Fill half with jam and half with dark chocolate ganache for a mixed tray that covers every craving. Roll the outsides in chopped pistachios for a pop of green that’s perfect for Christmas. However you make them, I’m confident these gluten free thumbprint cookies will become one of your most-requested bakes.
Leave a comment, share a photo, or let me know what filling you tried — I’d genuinely love to hear how yours turned out. Happy baking.
Recipe developed and tested by Cleantastehub.com. All content is original. Please do not republish without permission.
Gluten Free Thumbprint Cookies
Ingredients
Equipment
Method
- Preheat your oven to 350°F (175°C). Line two baking sheets with parchment paper and set aside. If butter, egg yolk, or jam have been refrigerated, remove them now to come to room temperature.
- In a medium bowl, whisk together the blanched almond flour, tapioca starch, salt, and baking powder until evenly combined and free of lumps. Break up any packed sections of almond flour. Set aside.
- In a large mixing bowl, beat the softened butter and granulated sugar together on medium-high speed for 2 to 3 minutes until the mixture is pale, fluffy, and noticeably lighter in color.
- Add the egg yolk, vanilla extract, and almond extract to the creamed butter. Beat on medium speed for about 1 minute until fully incorporated and smooth. Scrape down the sides and bottom of the bowl with a rubber spatula.
- Add the dry ingredient mixture to the wet ingredients all at once. Mix on low speed until a soft, cohesive dough forms. If the dough feels too sticky to roll, refrigerate for 10 to 15 minutes before proceeding.
- Using a 1.5-tablespoon cookie scoop or tablespoon measure, portion the dough into even balls. Roll each portion between your palms into a smooth, round ball. If using chopped nuts, roll each ball in them now. Place on prepared baking sheets at least 1.5 inches apart.
- Using your thumb, the rounded back of a ¼ teaspoon measuring spoon, or a wooden spoon handle, press a firm, defined well into the center of each cookie ball — deep enough to hold filling but not all the way through. Press any cracked edges back together with your fingers.
- Spoon approximately ½ teaspoon of jam into each well. Do not overfill — jam spreads and bubbles during baking and will overflow if the well is too full.
- Bake for 12 to 14 minutes until the edges are lightly golden and the centers look set. The cookies will still appear soft — this is correct. Immediately re-press the wells with the back of a measuring spoon if they have puffed up during baking. Do not overbake.
- Allow cookies to cool on the baking sheet for 10 full minutes before transferring to a wire rack — almond flour cookies are fragile when hot. Once completely cool, dust lightly with powdered sugar if desired and serve.


