Garlic Butter Pork Chops: 6 Steps to the Juiciest Skillet Dinner Ever

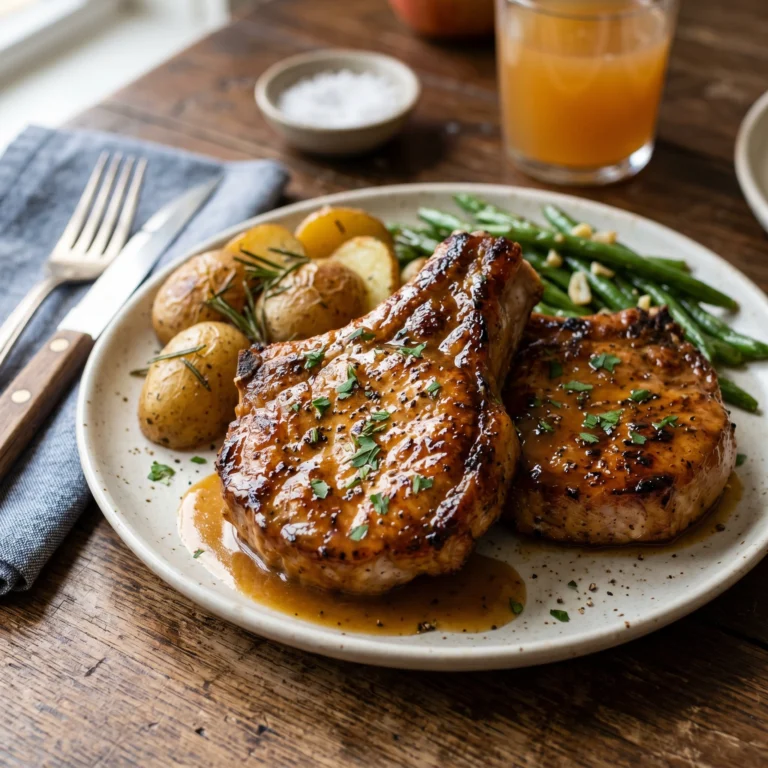
Garlic butter pork chops are the kind of recipe that makes you feel like a professional line cook on a Tuesday evening with almost zero effort. We’re talking golden-brown, perfectly seared chops with a crust that crackles when you cut into it, followed by a rush of buttery, garlicky, herb-kissed juice that pools in every crevice of the meat. It’s the sort of dinner that makes everyone at the table go quiet for a few seconds — the kind of quiet that means it’s good.
If pork chops have let you down before — dry, rubbery, flavorless — I promise that ends today. The mistakes most home cooks make with pork chops are fixable, and once you understand the simple mechanics behind getting them right, this recipe becomes one of the most reliable things in your weeknight rotation. No fancy equipment, no long marinade, no complicated technique. Just a hot pan, real butter, good garlic, and about 20 minutes of your time.
This guide covers everything: the best cut to use, the exact method for achieving a deep golden sear without overcooking the interior, how to build the garlic butter sauce right in the pan, and every pro tip I’ve picked up over years of making this dish for family and friends. By the time you’re done reading, you’ll have all the tools you need to make garlic butter pork chops that rival anything from a proper restaurant kitchen.
Why This Garlic Butter Pork Chops Recipe Works
There are hundreds of pork chop recipes on the internet. Here’s what separates this one from the pack.
The method centers on two non-negotiable principles: high heat for the sear and basting for moisture. The high heat creates the Maillard reaction — that deep golden-brown crust packed with flavor that no amount of sauce can replicate. The basting, which involves repeatedly spooning the hot garlic butter over the chops as they finish cooking, keeps the surface moist, infuses the meat with flavor from the outside in, and produces that glossy, lacquered finish you see in restaurant presentations.
The result is a pork chop that’s crisp on the outside, tender and juicy on the inside, and surrounded by a pan sauce so good that most people end up using bread to wipe the skillet clean.
- Ready in 20 minutes — from fridge to table
- One pan, minimal cleanup — sauce made in the same skillet
- Works with bone-in or boneless chops — flexible for what’s available
- Deeply flavorful — garlic butter, fresh herbs, and a hint of lemon
- Foolproof with the right technique — no more dry, tough pork chops
What Cut of Pork Chop Is Best?
Not all pork chops are created equal, and the cut you choose will affect both cooking time and final texture. Here’s a quick breakdown:
Bone-in rib chops (recommended): These are cut from the rib section and typically have a small bone running along one side. The bone conducts heat and helps the meat cook more evenly while also adding flavor. They’re the top choice for this recipe — usually about 1 to 1.25 inches thick.
Bone-in center-cut chops: Slightly leaner than rib chops, with both a T-shaped bone and a small tenderloin section. They cook beautifully in this recipe but are more prone to drying out if overcooked by even a minute or two.
Boneless center-cut chops: The most widely available cut in supermarkets. They work perfectly well here, but because they’re leaner and have less natural fat marbling, they can go from perfectly cooked to dry very quickly. Keep a close eye on the internal temperature.
Thickness matters most: Regardless of cut, aim for chops that are at least 1 inch thick, ideally 1.25 inches. Thin chops cook through before the exterior develops a meaningful crust. If you can only find thin chops, reduce the sear time accordingly and rely on the thermometer more than the timer.
Ingredients for Garlic Butter Pork Chops
Serves 4 | Prep time: 5 minutes | Cook time: 14–18 minutes | Rest time: 5 minutes
For the Pork Chops
- 4 bone-in pork rib chops, approximately 1–1.25 inches thick (about 250–280g each)
- 1 teaspoon kosher salt (plus more to taste)
- ½ teaspoon freshly ground black pepper
- ½ teaspoon garlic powder
- ½ teaspoon smoked paprika (adds color and subtle depth)
- 1½ tablespoons neutral oil (avocado oil, grapeseed oil, or canola — something with a high smoke point)
For the Garlic Butter Sauce
- 4 tablespoons (55g) unsalted butter, divided
- 6 cloves of garlic, peeled and lightly smashed (not minced — this prevents burning)
- 4 sprigs fresh thyme (or 2 sprigs fresh rosemary, or a combination)
- 1 tablespoon fresh lemon juice (added at the very end)
- Optional: ½ teaspoon red pepper flakes — for a gentle heat
- Optional: 1 tablespoon fresh flat-leaf parsley, finely chopped — for finishing

Ingredient Notes
On butter: Use unsalted butter so you control the salt level of the final sauce. Salted butter can push the dish over the edge, especially if you’re using seasoned chops. European-style butter (higher fat content) produces a notably richer, silkier sauce but isn’t required.
On garlic: Smashed whole cloves rather than minced garlic is a deliberate choice. Minced garlic burns almost instantly in a hot pan and turns bitter. Smashed cloves release their flavor slowly and steadily into the butter without scorching.
On herbs: Fresh thyme is the default and pairs impeccably with pork. Rosemary works beautifully too but is more assertive — use a lighter hand. Sage is an underused option that’s particularly wonderful in autumn and winter.
On the oil: Do not use olive oil for the sear. Extra virgin olive oil has a low smoke point and will fill your kitchen with smoke before the pan is hot enough to sear properly. A neutral oil with a high smoke point is essential here.
Step-by-Step Instructions: How to Make Garlic Butter Pork Chops
Step 1 — Bring the Chops to Room Temperature and Season
Remove the pork chops from the refrigerator at least 20–30 minutes before cooking. This is not optional fussiness — cold meat placed in a hot pan contracts unevenly, leading to tougher texture and uneven cooking. Room temperature meat sears more evenly and cooks through more predictably.
While they’re coming to temperature, pat each chop completely dry on both sides using paper towels. This single step is the most underrated part of the recipe. Moisture on the surface of the meat creates steam instead of a sear — steam is the enemy of the crust you’re trying to build.
Combine the salt, black pepper, garlic powder, and smoked paprika in a small bowl. Season both sides of each chop generously and evenly, pressing the seasoning gently into the surface.

Step 2 — Heat the Pan Until Properly Hot
Place a heavy stainless steel or cast iron skillet over medium-high heat. Allow it to heat for at least 2 minutes — you want it genuinely hot before the oil goes in. Add the neutral oil and swirl to coat the pan. When the oil begins to shimmer and just barely starts to smoke, you’re ready.
A properly heated pan is the difference between a deep golden crust and a grey, steamed surface. If your pan isn’t hot enough, the chops will stick, lose their moisture, and never develop the caramelized exterior that makes this recipe special.
Testing the pan: Hold your palm a few inches above the surface — you should feel significant, almost uncomfortable heat radiating from it. Alternatively, flick a single drop of water into the pan; it should evaporate almost instantly.
Step 3 — Sear the First Side Without Moving the Chops
Place the chops in the pan carefully, laying them away from you to prevent oil splatter. Do not crowd the pan — if your skillet is smaller than 12 inches, cook in two batches. Crowding drops the pan temperature and causes steaming.
Once the chops are in, do not touch them. Do not press them, do not move them, do not check underneath. Let the heat do its work undisturbed for 3 to 4 minutes. The chops will release naturally from the pan when the crust is fully developed. If you try to lift them and they resist, they’re not ready — give them another 30 to 60 seconds.
When the first side is a deep, mahogany-golden brown, flip each chop using tongs.

Step 4 — Add Butter, Garlic, and Herbs; Begin Basting
Immediately after flipping, reduce the heat to medium. Add 2 tablespoons of the butter, the smashed garlic cloves, and the fresh thyme sprigs to the pan. The butter will foam and sizzle dramatically — this is exactly what you want.
As the butter melts, tilt the pan slightly toward you so the butter pools at the front edge. Using a large spoon, scoop up the butter and pour it continuously over the tops and sides of the chops. Repeat this basting motion every 20–30 seconds for the remainder of the cooking time.
This process — called arroser in classical French cooking — serves multiple purposes simultaneously: it cooks the top of the chop gently with hot butter while the bottom sears against the pan; it infuses the meat with garlic and herb flavor from the outside in; and it keeps the surface lacquered and moist rather than drying out under direct heat.
Cook the second side for 3 to 4 minutes, basting continuously, until the chops are cooked through.
Step 5 — Check Internal Temperature
Pork is safe to eat at an internal temperature of 145°F (63°C) followed by a 3-minute rest, per current USDA guidelines. This produces a slightly pink, juicy interior — not raw, not overcooked. If you grew up being told pork must be cooked to 160°F or higher, know that the guidelines were updated in 2011 and 145°F is both safe and far more delicious.
Insert an instant-read thermometer into the thickest part of the chop, away from the bone. Pull the chops from the pan when they read 140–142°F — they will carry-over cook to 145°F during the rest.
Remove the chops to a clean plate or cutting board and tent loosely with foil.
Step 6 — Finish the Pan Sauce and Serve
With the chops resting, keep the pan over medium heat. Add the remaining 2 tablespoons of butter and let it melt into the pan juices, garlic, and herb residue. Stir or swirl gently to incorporate everything. Squeeze in the lemon juice — it will sizzle and lift any browned bits from the bottom of the pan (this is called deglazing, and every one of those browned bits is pure flavor).
Let the sauce bubble for 60 seconds until it tightens slightly and becomes glossy and cohesive. Taste and adjust salt if needed.
Pour the finished garlic butter sauce directly over the resting chops. Scatter fresh parsley over the top if using. Serve immediately.

Pro Tips for Perfect Garlic Butter Pork Chops
These are the details that elevate a good recipe into a great one — the kind of techniques that become instinct after the third or fourth time you make this dish.
1. Dry the meat like you mean it. Paper towels are not sufficient if the chops came straight from a vacuum-sealed package. Press firmly, let the surface air-dry for a minute or two after toweling, then season. Even a small amount of residual surface moisture compromises the crust.
2. Don’t skip the rest. Five minutes of resting time after cooking is not optional. During cooking, the proteins in the meat contract and squeeze moisture toward the center. Resting allows them to relax and redistribute that juice throughout the chop. Cut too early and you’ll watch a pool of juice leave the meat and collect on the cutting board — juice that should be in your mouth.
3. Use a thermometer every single time. Visual cues are unreliable for pork. The color of the exterior, the firmness of the meat, the color of the juices — none of these are as accurate as a simple instant-read thermometer. Invest in one if you haven’t already; it’s the most impactful $15 kitchen tool available.
4. Smash the garlic, don’t mince it. Already covered in the ingredients section, but worth repeating: minced garlic burns at the temperatures needed for this recipe. Smashed whole cloves provide a gentler, more even garlic flavor throughout the sauce.
5. Brown butter = deeper flavor. If you want to take the sauce to another level, let the butter cook a few extra seconds past melting until the milk solids at the bottom turn a light hazelnut brown. The aroma will tell you when it’s there — a nutty, almost caramel-like smell. Work quickly after this point as it can go from browned to burned in seconds.
6. Bone-side first. If your chops have a strip of fat along the bone edge, stand them on that edge for 60–90 seconds before laying them flat. This renders some of the fat and keeps it from curling up during the flat sear.
7. One pan, maximum flavor. Resist the urge to use a fresh pan for the sauce. The fond — those caramelized brown bits stuck to the bottom of the skillet after searing — is concentrated, deeply flavored pork essence. The lemon juice and butter dissolve and incorporate it into the sauce, making it far richer than any sauce made in a clean pan.
Common Mistakes to Avoid
Mistake #1: Cooking cold chops straight from the fridge. Cold meat = uneven cooking. The exterior overcooks while the interior struggles to reach temperature. Twenty to thirty minutes at room temperature makes a meaningful difference.
Mistake #2: Using a pan that isn’t hot enough. An under-heated pan produces a grey, sad exterior with no crust. The Maillard reaction — the browning that creates flavor — requires high, direct heat. Be patient with the preheating step.
Mistake #3: Moving the chops around during the sear. Every time you move the meat, you interrupt the crust formation. Place it, leave it, walk away.
Mistake #4: Using minced garlic in the butter. Minced garlic in a hot butter pan goes from golden to acrid and burnt within 30 seconds. It will make the entire sauce bitter. Always use smashed whole cloves.
Mistake #5: Cooking to 160°F or higher. This was the old guideline and it results in dry, chalky pork. The USDA updated its recommendation to 145°F with a 3-minute rest in 2011. Trust the thermometer, not the old rule.
Mistake #6: Skipping the lemon juice. It might seem like a minor finishing touch but it’s genuinely transformative. The acidity cuts through the richness of the butter and brightens the entire flavor profile. The sauce tastes flat without it.
Mistake #7: Overcrowding the pan. Two chops per standard 12-inch skillet is usually the practical limit. Crowding drops the pan temperature significantly, causing the chops to steam rather than sear and resulting in that grey, moisture-logged surface.

Storage and Serving Suggestions
How to Store Leftover Garlic Butter Pork Chops
Refrigerator: Allow the chops to cool completely before storing. Transfer to an airtight container along with any remaining pan sauce. Refrigerated pork chops will keep for up to 3 to 4 days. Store the sauce separately if possible to prevent the crust from softening.
Freezer: Cooked pork chops freeze reasonably well for up to 2 months. Wrap each chop individually in plastic wrap before placing in a freezer bag to prevent freezer burn. Thaw overnight in the refrigerator.
Reheating: The single biggest threat to leftover pork chops is overcooking during reheating. The best method is a gentle warm-up in a covered skillet over low heat with a splash of chicken broth or water to create steam. Avoid the microwave if possible — it continues to cook the meat and almost always produces a tough, dry result. An oven at 275°F covered with foil for 10–12 minutes is another solid option.
What to Serve with Garlic Butter Pork Chops
The richness and intensity of the garlic butter sauce means this dish pairs best with sides that either complement or contrast it cleanly.
Starchy sides that absorb the sauce beautifully:
- Creamy mashed potatoes — the classic pairing, and for good reason
- Buttered egg noodles or soft polenta
- Crusty bread for direct sauce-scooping
- Fluffy white rice or cauliflower rice for a lighter option
Vegetables that balance the richness:
- Roasted asparagus with lemon and sea salt
- Sautéed spinach or broccolini with garlic
- Honey-glazed roasted carrots
- A crisp apple and fennel slaw — the sweetness and anise note are a natural match for pork
Salads that provide freshness and contrast:
- Simple arugula salad with shaved Parmesan and a sharp vinaigrette
- Tomato and cucumber salad with red onion and herbs
- Classic Caesar — the anchovy depth echoes the savory richness of the pork
Creative Ways to Use Leftovers
Leftover garlic butter pork chops shouldn’t just be reheated and replated. Sliced thinly, they make exceptional:
- Banh mi-style sandwiches with pickled vegetables and sriracha mayo
- Grain bowls with roasted vegetables and a tahini drizzle
- Fried rice additions — chop into small pieces and stir-fry with day-old rice and egg
- Tacos with mango salsa and cotija cheese
- Pasta with the leftover sauce thinned with pasta water
Frequently Asked Questions About Garlic Butter Pork Chops
1. Can I make this recipe with boneless pork chops?
Absolutely. Boneless center-cut pork chops work well with this exact method, but because they’re leaner than bone-in chops, they cook faster and are more prone to drying out. Reduce the searing time by about 1 minute per side and rely heavily on the thermometer. Pull them at 138–140°F and let carry-over cooking bring them to 145°F during rest.
2. How do I keep pork chops from curling up in the pan?
Curling happens when the strip of connective tissue and fat running around the outer edge of the chop contracts faster than the meat under heat. Two solutions: first, score the fat cap with a sharp knife every half inch before cooking — this severs the connective tissue and prevents the pull. Second, if they do begin to curl, press them flat gently with a spatula for the first 60 seconds of the sear.
3. Can I use this recipe in the oven instead of on the stovetop?
Yes, with a minor modification. Use an oven-safe skillet (cast iron is ideal). Sear the chops as directed in Steps 1–3 to develop the crust, then transfer the entire pan to a 400°F oven for 4 to 6 minutes to finish cooking through. Make the garlic butter sauce in the same pan after removing the chops. This method is particularly useful for very thick chops (over 1.5 inches) where stovetop cooking alone might leave the center undercooked by the time the exterior is done.
4. What can I substitute for fresh thyme or rosemary?
If fresh herbs aren’t available, dried herbs work as a backup — use about one-third the amount since dried herbs are more concentrated. A half teaspoon of dried thyme added to the butter is a reasonable substitute for 4 fresh sprigs. You can also use fresh sage (2–3 leaves) for an earthy, slightly savory note that’s particularly good in the fall, or a small amount of fresh oregano for a Mediterranean twist.
5. My garlic butter sauce is splitting and looks greasy — how do I fix it?
A broken butter sauce happens when the emulsion separates — essentially, the water and fat in the butter stop playing nicely together. This usually occurs if the heat gets too high after the butter goes in. To fix it: remove the pan from heat entirely, add 1 tablespoon of cold water or cold butter, and whisk or swirl vigorously. The sauce should come back together almost immediately. To prevent it: keep the heat at medium (not medium-high) once the butter is added.
6. Can I make the garlic butter sauce ahead of time?
The sauce is best made fresh in the same pan used to cook the pork — the fond (browned bits) from the sear is a key flavor component that can’t be replicated in a clean pan. However, a compound garlic herb butter can be made days in advance: blend softened butter with roasted garlic, fresh thyme, lemon zest, and salt; roll into a log in plastic wrap and refrigerate. Place a slice on each finished chop and let it melt at the table for a beautiful presentation.
7. Is this recipe keto or low-carb friendly?
Yes. As written, garlic butter pork chops contain virtually zero carbohydrates. The seasoning blend, butter, garlic, herbs, and lemon juice are all negligible in carb content. Pair with cauliflower mash or roasted low-carb vegetables for a complete keto-compatible meal.
Nutrition Information (Approximate Per Serving)
Based on one bone-in pork rib chop with garlic butter sauce, approximately 260g cooked weight. Values are estimates and will vary based on the exact cut used, cooking oil absorption, and any additional toppings.
| Nutrient | Amount Per Serving |
|---|---|
| Calories | 420 kcal |
| Total Fat | 28g |
| Saturated Fat | 12g |
| Cholesterol | 135mg |
| Sodium | 520mg |
| Total Carbohydrates | 2g |
| Dietary Fiber | 0g |
| Sugars | 0g |
| Protein | 38g |
| Potassium | 620mg |
| Vitamin B6 | 35% DV |
| Zinc | 18% DV |
| Iron | 8% DV |
A note on nutrition: Pork is an excellent source of complete protein and B vitamins, particularly thiamine (Vitamin B1), niacin, and B6. It’s also a meaningful source of zinc and selenium. The majority of the fat content in this dish comes from the butter in the sauce — reducing the butter from 4 tablespoons to 2 will lower the fat significantly while still producing a flavorful result.
A Note on Pork Quality
The difference between supermarket pork and heritage-breed pork is noticeable in this recipe, where the meat is the undisputed star. Heritage breeds like Berkshire (known as Kurobuta), Duroc, and Hampshire are bred for flavor and fat marbling rather than lean uniformity. If you have access to a butcher or farmers’ market that carries heritage pork, this is the recipe to splurge for it.
That said, standard supermarket pork chops made with this method are still dramatically better than most people expect — the technique matters more than the provenance.
Conclusion
There are recipes you make once and then occasionally come back to, and there are recipes that quietly become part of your regular cooking life — the ones that feel effortless after the second time and that your household starts requesting by name. Garlic butter pork chops belong firmly in the second category.
The keys are simple and few: dry the meat, heat the pan properly, sear without interference, baste with real butter and good garlic, and stop cooking at 145°F. Follow those principles and the result will be a juicy, golden-crusted, deeply flavorful pork chop surrounded by a pan sauce that makes even the most mundane Tuesday evening feel like a proper dinner.
Once you’ve nailed the base recipe, the variations practically write themselves — a splash of white wine in the sauce, a handful of capers, a different herb, a hit of mustard. But if you make this recipe exactly as written the first time, I suspect you won’t feel much urgency to change anything at all.
Now go get your pan hot.
Did you make this recipe? Tag it with #garlicbutterporkchops and share your results!

Garlic Butter Pork Chops
Equipment
- 12-inch Cast Iron Skillet Best for achieving a deep, even sear. A heavy stainless-steel pan also works well.
- Instant-Read Meat Thermometer Essential for cooking pork chops to the perfect 145°F without overcooking.
- Large Spoon For basting the chops with garlic butter during the final cooking stage.
- Tongs For safely flipping chops and searing the fat cap.
Ingredients
- 4 bone-in pork chops, 1 to 1.5 inches thick (8–10 oz each)
- 1.5 tsp kosher salt
- 1 tsp freshly cracked black pepper
- 1 tsp garlic powder
- 0.5 tsp smoked paprika
- 0.5 tsp onion powder
- 2 tbsp neutral oil (avocado, grapeseed, or canola)
- 4 tbsp unsalted butter, divided
- 6 cloves fresh garlic, minced (about 2 tbsp)
- 1 tsp fresh thyme leaves (or 1/2 tsp dried)
- 1 tsp fresh rosemary, finely chopped (or 1/2 tsp dried)
- 1 tbsp fresh flat-leaf parsley, chopped (for finishing)
- 0.5 tsp red pepper flakes (optional)
- 0.5 lemon, juiced (optional, for brightness)
Instructions
- Remove pork chops from the refrigerator 20–30 minutes before cooking to bring them to room temperature. Pat each chop completely dry with paper towels — this is essential for a proper sear. Mix the kosher salt, black pepper, garlic powder, smoked paprika, and onion powder in a small bowl. Generously coat all sides of each chop with the spice mixture, pressing gently so it adheres.
- Place a 12-inch cast iron or heavy stainless-steel skillet over medium-high heat. Add the 2 tablespoons of neutral oil and heat for 2–3 minutes until the pan is very hot. The oil should shimmer and move fluidly — if a drop of water vaporizes instantly when flicked in, you’re ready.
- Carefully lay the pork chops into the pan, leaving at least 1 inch of space between each. Do not move them — let them sear undisturbed for 3–4 minutes until a deep golden crust forms and they release easily from the pan. Flip and sear the second side for another 3–4 minutes. For extra flavor, hold each chop upright with tongs to sear the fat cap for about 1 minute.
- Reduce heat to medium-low. Push chops to the edges of the pan. Add 2 tablespoons of butter to the center. Once it melts and foams, add the minced garlic, thyme, and rosemary. Stir constantly for 45–60 seconds until fragrant and just turning golden — watch carefully, do not let it burn.
- Add the remaining 2 tablespoons of butter. As it melts, tilt the pan slightly and use a large spoon to continuously baste the pork chops with the garlic butter, spooning it over the top repeatedly. Continue basting and cooking until an instant-read thermometer inserted into the thickest part reads 145°F (63°C), about 3–5 more minutes.
- Transfer the chops to a cutting board or warm plate. Tent loosely with foil and rest for 5 minutes — do not skip this step. While the chops rest, squeeze the lemon juice into the remaining garlic butter in the pan and stir to combine. Spoon the sauce over the chops, scatter with fresh parsley, and serve immediately with lemon wedges.